Drawing in GIMP: brushes, layers and a simple first illustration
Start with one predictable brush, separate the outline from colour and check pressure mappings before adding more tools.
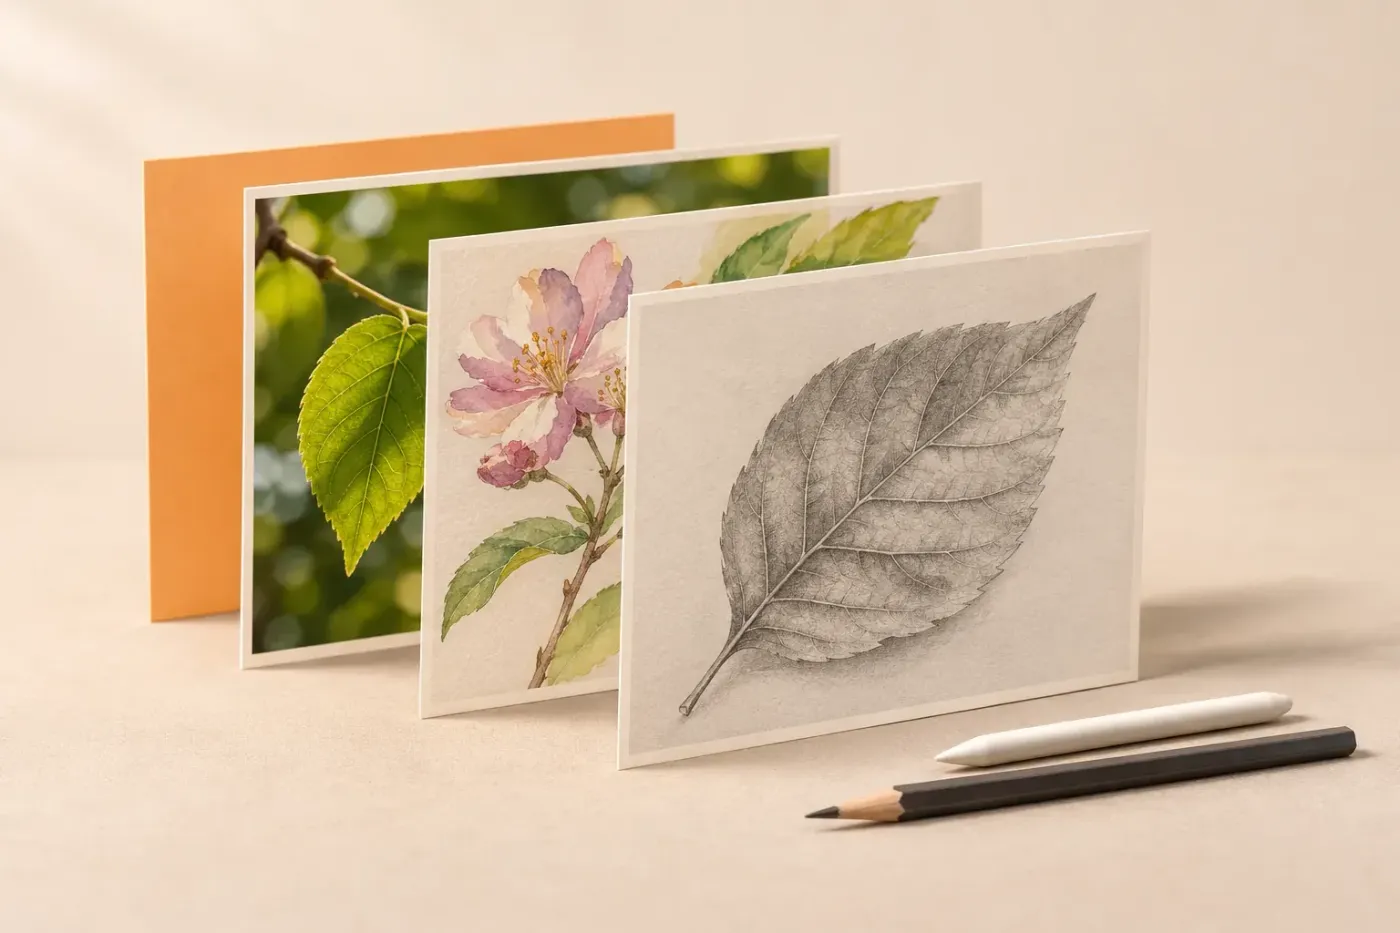
To draw in GIMP, choose the Paintbrush tool with P, pick a foreground colour and paint on a transparent layer above the background. Keep your outline and colour on separate layers, then save the working drawing as an XCF before exporting an image. I'd start with one plain round brush and a small leaf illustration: you can practise a curve, a closed outline and a fill without trying to learn every paint tool at once.
Set up a canvas and a predictable brush
Choose File → New… and set the dimensions in pixels. For the practice leaf below, 1600 × 1200 px gives you room to draw and inspect the edge. That's an example canvas, not a required drawing size. In Advanced Options, use RGB colour and a white fill. GIMP's new-image settings separate pixel dimensions from print resolution; increasing the resolution number alone doesn't add pixels or improve a line.
Select the background layer, choose Layer → New Layer…, name it Sketch and set Fill With to Transparency. Leave its width and height at the canvas dimensions. A new layer is inserted above the selected layer, so the white background stays underneath your marks. Make sure only Sketch is selected.
Press P for Paintbrush. If you can't see its settings, double-click the Paintbrush icon, or open Windows → Dockable Windows → Tool Options. These controls belong to the active Paintbrush tool; selecting another tool changes the options shown there.
- Set Mode to Normal and Opacity to 100.
- Choose a plain round brush. For the clean outline, use a hard-edged round tip; begin with Size 8 px on this example canvas and adjust it after a test mark.
- Turn Enable dynamics off for the first mouse exercise, so pressure, fade or speed mappings aren't changing the line.
- Leave Apply Jitter off. Start with Smooth stroke off too; add smoothing only if the freehand line needs it.
Click the foreground colour swatch in the toolbox and choose a visible grey for the sketch. Make a short curve on Sketch. A consistent, visible mark is the checkpoint before you draw the subject. If it doesn't appear, use the recovery table below rather than changing several settings together.
Paintbrush is the useful starting point for ordinary illustration. The Pencil tool deliberately omits antialiasing, making it suitable when you want hard pixel edges. It isn't the fix for an accidentally jagged painted curve.
Draw a leaf on Sketch, Ink and Colour layers
The finished leaf has a dark outline and veins, a green interior and a white background. Sketch supplies the guide and is hidden at the end. The important separation is between the linework and its fill: changing the green shouldn't require repainting the outline.
1. Sketch the silhouette
On Sketch, draw a curved centre line from the stem to the tip. Draw one outward curve on either side, joining them at both ends to make an almond-shaped leaf. Add a few short side veins. Keep the shape large enough that you can comfortably follow its edge.
Lower the Sketch layer's Opacity in the Layers dialog until the guide is faint. Around 25% is a reasonable starting point for this exercise. This changes the visibility of the whole sketch; keep the Paintbrush's own opacity at 100 for the next stage. The two opacity controls serve different jobs.
2. Ink the outline above the sketch
With Sketch selected, create another transparent layer named Ink. Choose a dark foreground colour and paint the two outer curves, then the centre vein and side veins. Use a smaller brush for the side veins if they compete with the outline. The layer called Ink is an ordinary transparent paint layer; you don't need to switch to GIMP's separate Ink tool.
For a wobbly mouse stroke, enable Smooth stroke in Paintbrush Tool Options and try another curve. GIMP exposes Quality and Weight when smoothing is enabled; higher Weight makes the stroke more rigid. Increase it gradually. Smoothing helps the shape of your movement, but it doesn't choose the leaf's contour for you. Undo an awkward stroke and redraw it, or use the path method below for a controlled curve.
Hide Sketch briefly with its visibility icon. Check that Ink contains a complete outline and the veins you want to keep. Turn Sketch back on if you still need the guide.
3. Put colour below the outline
Select Sketch again, then create a transparent layer named Colour. Because the new layer is placed above Sketch, it should sit immediately below Ink. Check the stack from top to bottom: Ink, Colour, Sketch, Background. If the order is wrong, move Colour below Ink in the Layers dialog before filling.
Create and confirm the leaf selection before using Fill with FG Color. Without an active selection, that command fills the whole active layer. The outline on Ink doesn't automatically act as a boundary for this command on Colour.
- Keep Colour selected and press F for Free Select. Use replace-selection mode, turn Feather edges off and leave Antialiasing on.
- Click around the leaf to make a polygonal selection, placing more points along curved areas. Let the selected region meet underneath the dark outline, so a white gap isn't left between line and fill.
- Click the starting point to close the shape, then press Enter to confirm it. GIMP's Free Select tool has a confirmation stage; a visible provisional outline isn't a reason to skip Enter.
- Choose a green foreground colour, then use Edit → Fill with FG Color. The foreground fill applies to the selected area on Colour. Ink remains separate above it.
- Choose Select → None, hide Sketch and inspect the finished leaf. Select None removes the selection boundary; hiding Sketch removes the construction lines.

Zoom in to check for green beyond the outside of the outline or a pale gap just inside it. Correct the Colour layer without touching Ink. With a polygonal fill, extra points around a tight curve usually give you a closer fit; a much larger brush won't repair the selection's shape.
To add a darker green edge or change the interior colour, select Colour and enable its Lock alpha control in the layer's lock options. GIMP's alpha lock preserves transparent areas, so painting stays within the existing silhouette. It won't help on a completely empty layer, and it won't preserve the original green shading if you paint over it. Duplicate Colour before a large repaint if you want a separate fallback.
Use straight lines, shapes and paths with a mouse
You can complete the leaf with a mouse. For an even curve, a path can be easier to adjust than repeated freehand attempts. Choose the method for the mark you need; there isn't a reason to force every line through the same tool.
Draw a straight line with Shift
Select the paint layer that should contain the line and choose Paintbrush. Click once at the start, hold Shift, then click at the endpoint while Shift is still held. Release Shift afterwards. That is GIMP's straight-line painting sequence. Holding Shift through further clicks continues from the previous endpoint.
The brush still determines the line's colour and width. Use a fresh transparent layer for a border or construction line that you may want to remove later.
Make a circle or a rectangular outline
On a new transparent layer, use Ellipse Select for a circle or oval, or Rectangle Select for a box. With Ellipse Select, start dragging first, then hold Shift to constrain the shape to a circle. Pressing Shift before starting instead changes the selection mode, as the ellipse modifier instructions explain.
Choose a foreground colour and use Edit → Stroke Selection…. Select the line-stroke option, set a width in pixels and apply it. Stroke Selection draws the selection border; Fill with FG Color fills its interior instead. Finish with Select → None. The marching-ants boundary itself isn't an exported outline.
Draw a curve you can adjust before painting
- Create a transparent layer for the painted curve and choose Paths with B.
- In Design mode, click to place a starting node. Click and drag a second node to pull out handles, then adjust the curve. Use as few nodes as the shape needs.
- Once the curve is right, set the foreground colour and choose Edit → Stroke Paths…. In the dialog, use the line option, set Line width and apply the stroke.
The path's nodes and handles remain editable, but a stroke painted onto a normal layer doesn't automatically redraw when you change the path. Remove or undo the old painted stroke before applying its replacement, or keep successive attempts on separate layers. The Stroke Paths dialog also offers paint-tool strokes; the line option is the simpler choice for an even outline.
GIMP 3.2 also has Create New Vector Layer in the Paths tool, which retains a path's fill and stroke settings. That's useful when those attributes need to remain editable with the path. An ordinary painted Ink layer and a vector layer have different editing behaviour; choose deliberately before building a larger illustration.
Set up pen pressure in two separate stages
A tablet moving the pointer proves that position input works. It doesn't prove that the brush is receiving pressure or using it. Check device recognition first, then check the dynamics mapping. Keep the trial marks on a disposable transparent layer.
- Open GIMP's Preferences, select Input Devices and click Configure Extended Input Devices. Look for the tablet's pen device rather than changing the mouse entry.
- Inspect the device mode. GIMP's input-device guidance uses Screen for tablet devices. A missing pen device needs attention at the device/driver connection level; a new brush preset can't make an unrecognised pen appear.
- Return to Paintbrush Tool Options and turn Enable dynamics on. Choose a dynamics preset, then open its edit button to inspect the matrix. For a line that widens with pressure, the Size row must be connected to the Pressure column.
- If the supplied preset is read-only, open the dynamics preset list and use its Open the dynamics selection button to reach the Paint Dynamics dialog. Duplicate the preset there before editing. For an isolated width check, keep only the Size–Pressure mapping enabled. A Pressure mapping on Opacity changes transparency instead of width. These are separate dynamics outputs.
- Use a clearly visible brush size and draw light, then firmer strokes with the pen. Look for a width change before adding opacity, tilt or other dynamics. Keep the same brush and layer while comparing the marks.
On Windows, Preferences → Input Devices → Pointer Input API offers Windows Ink and Wintab. The manual recommends Windows Ink for newer devices and Wintab as an alternative when it doesn't work. This control is Windows-only; don't look for it on macOS or Linux. Change one input option at a time and repeat the same simple stroke check.
For a mouse, leave pressure mapping out of the exercise. Some dynamics can use speed, direction or fade, but that doesn't turn a mouse into a pressure-sensitive pen. A constant-width brush, Shift lines and paths are enough to finish the leaf.
Fix the symptom before changing the drawing
Check one known Paintbrush mark on the intended layer. If that works, return to the setting that changes the result. This keeps a selection problem from turning into an unnecessary reset of your workspace.
| What you see | Check and next action |
|---|---|
| Nothing appears | Select a visible paint layer and its image thumbnail, not a layer mask. Check foreground colour, brush and layer opacity, Lock pixels, and a leftover selection. Lock alpha prevents marks in transparent areas. Use Select → None, then try again. |
| Green covers the outline | Colour is probably above Ink, or you're painting directly on Ink. Inspect the selected layer and put Colour below the linework. |
| Fill colours the whole layer | Undo the fill. Confirm the closed leaf selection before Fill with FG Color. A separate outline layer isn't a selection. |
| The curve has hard stair steps | Check that you're using Paintbrush rather than Pencil. Inspect the result at 100% zoom. A low-resolution painted edge can't gain detail merely by changing the print-resolution field. |
| A stroke feels stiff or slow to follow | Reduce Smooth stroke Weight or temporarily disable smoothing and compare. Also try a smaller, simpler brush. Smoothing is one check, not proof of the cause of every tablet delay. |
| Pen marks vary in darkness but not width | Inspect the dynamics matrix for Pressure → Opacity versus Pressure → Size. Verify the mapping before changing the input API. |
If a basic mark still fails, try a new canvas with one transparent layer and the simple brush settings from the opening section. That separates an image-specific lock or selection from a tool or device problem. Don't flatten the drawing to repair a brush setting; that removes the layer separation you need for later corrections.
Save the editable drawing, then export its visible result
Choose File → Save As… and save leaf.xcf. Keep Ink, Colour and the hidden Sketch in the project, then save again as you work. GIMP's XCF format preserves the editing structure, but it doesn't save the undo history. Save a separate version before a large change if you need a dependable earlier state.
For a finished image, choose File → Export As… and enter a filename such as leaf.png. PNG is useful for line drawings and supports transparency. If you want a transparent surround, hide the white Background layer as well as Sketch before exporting, and retain an alpha-capable pixel format in the PNG export options. Leaving the white layer visible produces a white background even though Colour has transparent space around the leaf.
Open the exported file and check the outline, colour, background and pixel dimensions at the size where the drawing will be used. Keep the XCF alongside it. For the next drawing, reuse the separation of guide, line and fill; add more brushes only when a particular mark calls for them.

Elena Morris
Elena Morris is the GIMP image-editing and compositing editor at TheGIMP.net. She writes about selections, masks and layers, restrained retouching, compositing and export.