Inkscape vs GIMP: vector drawings or pixel edits
Keep a logo master as SVG in Inkscape, edit photographs in GIMP, and use GIMP 3.2 link layers when a composition needs reusable external artwork.
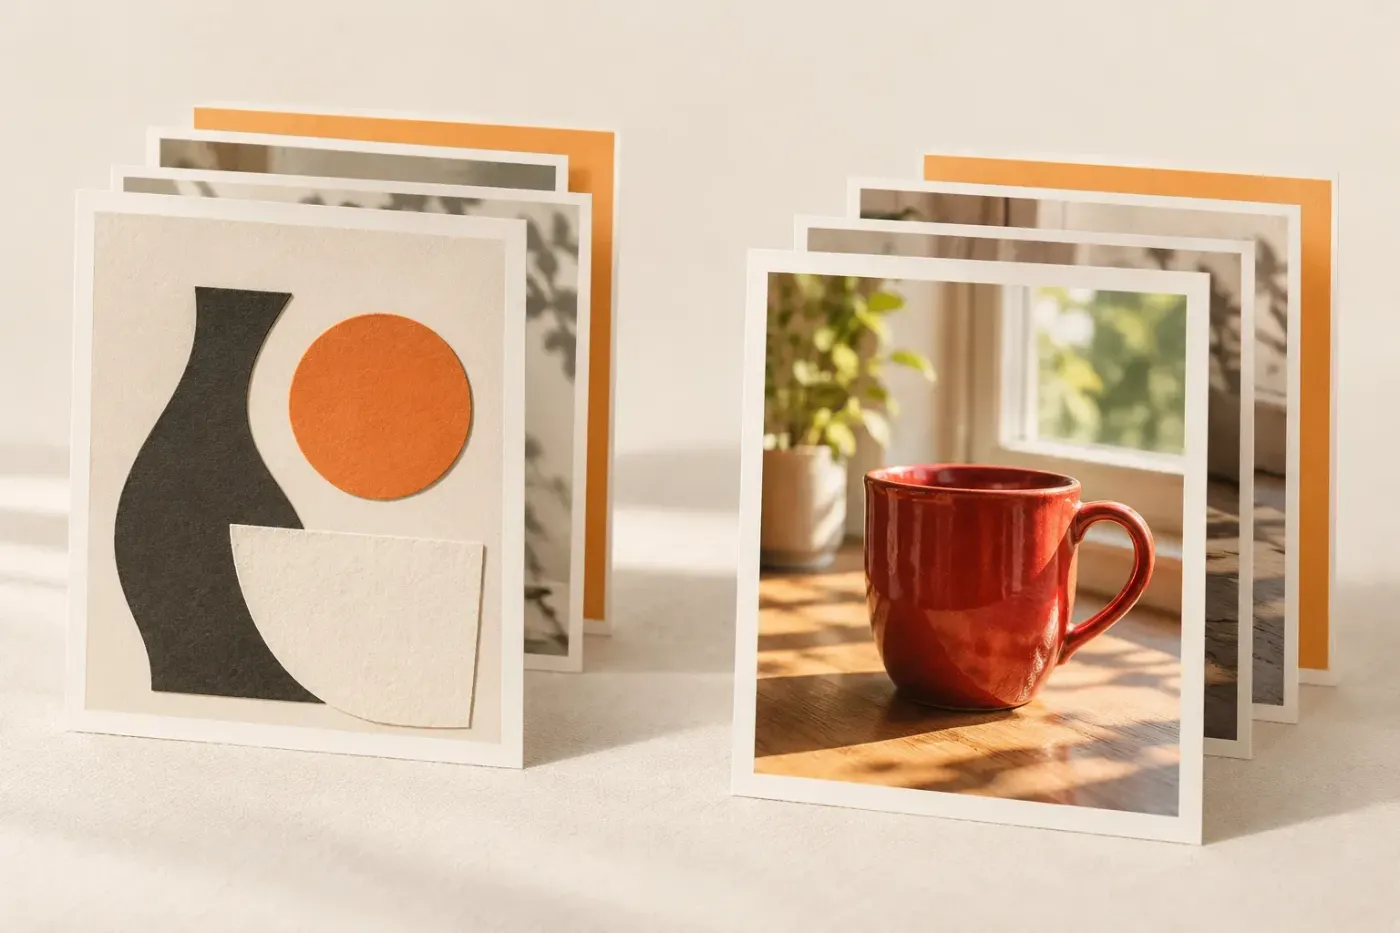
Choose Inkscape for logos, icons and drawings that need editable vector shapes. Choose GIMP for photo corrections, cutouts and compositions built from pixels and masks. I'd keep a reusable logo as an SVG in Inkscape and bring it into GIMP when a photograph needs it; GIMP 3.2's vector layers are useful inside a composition, but a dedicated vector editor gives you stronger tools for reshaping the logo.
Choose by the next change you need to make
The useful question is what must remain editable. A curve defined by nodes can be reshaped and rendered at another size. A photograph contains a fixed grid of pixels; changing its file extension doesn't recover detail that wasn't recorded. GIMP's explanation of paths and SVG distinguishes those two kinds of information while confirming that GIMP can work with both.
| Your task | My starting point | Keep for later changes |
|---|---|---|
| Logo for a website, sign and printed card | Inkscape: edit its curves, objects and lettering | SVG master, with required fonts or a separate outlined delivery copy |
| Retouch a photograph or refine a cutout | GIMP: work on pixels, selections and masks | XCF with its separate layers and masks |
| Web icon, diagram or flat illustration | Inkscape: build the shapes, then inspect the delivered size | SVG plus any requested PNG export |
| Photo banner with a headline and logo | GIMP for the photo composition; Inkscape for a reusable logo | XCF and the external SVG if it is linked |
| A badge or outlined caption inside an existing photo edit | GIMP 3.2: a vector or text layer can be enough | XCF with that special layer still editable |
| Painting made from textured brush strokes | A raster painting workflow; GIMP can paint, while Krita deserves a separate comparison | The chosen editor's layered project |
Neither program wins every kind of graphic. An SVG can contain a bitmap, and an XCF can contain vector paths. Judge the objects you can select and change, rather than assume that the file extension tells the whole story.
For a simple 2D game, I'd choose by the artwork's construction: editable flat shapes in Inkscape, pixel-by-pixel or textured edits in GIMP. Save that native master and export the file type and pixel dimensions the game accepts. A scalable SVG master still needs a check at the delivered size when the final sprite is a small raster image.
Use GIMP for photographs, selections and masks
GIMP's core work includes photo retouching and image composition. That makes it the direct choice for removing a blemish, adjusting tones or combining a subject with a different background. Inkscape can place and clip a photograph, but placing it as an object doesn't give you GIMP's pixel-editing workflow.
I'd keep a cutout's edge on a layer mask so the boundary remains adjustable. Keep the photograph and logo on separate layers, and save an XCF before exporting the finished image. Settle the crop and tonal correction before designing lettering around the photograph, so a later crop doesn't cut through the layout.
Old comparisons often describe every GIMP filter as permanent. GIMP 3 introduced non-destructive filter editing, and GIMP 3.2 extends that workflow. Preserve the editable filter where the operation supports it. Painting directly over pixels still needs care; a program gaining non-destructive features doesn't make every action reversible after saving.
Use Inkscape for a logo or drawing you will reuse
Inkscape's path and object tools include node and Bézier-handle editing, Boolean operations, Shape builder, alignment and non-destructive path effects. They suit a logo whose curves, gaps and proportions need repeated revision. A vector outline can be rendered at a different size without first enlarging an old PNG.
For a new logo, I'd build the main forms before adding effects. Save the drawing as Inkscape SVG, keep text editable in the master, and create the recipient's version separately. If a recipient needs lettering converted to paths, preserve a text-editable copy first: the outlined letters are shapes, so correcting a word is no longer ordinary text editing.
For an icon, check both the SVG and the actual delivered pixel size. Small gaps can close and thin strokes can become hard to see even when the source curves are mathematically clean. Use pixel width and height for a web delivery; changing a PPI field alone doesn't create the missing pixels. A larger PNG is useful only if the destination needs that size.
Inkscape also has drawing tools, including Pencil and Calligraphy. Their strokes belong to a vector-object workflow. I'd choose those for editable line shapes; for painting whose texture comes from many pixel brush strokes, compare the painting controls in Krita and GIMP.
What GIMP 3.2's vector layers change
GIMP 3.2 has vector layers based on paths, with editable fill and stroke settings. They make a badge, simple shape or border easier to revise inside a photo composition. The 3.2 release notes also document non-destructive rotation, scaling and other transforms for these layers.
Create the path with the Paths tool, then use Create Vector Layer from Path in its options. The Paths tool page also uses the label Create New Vector Layer; the button's wording changes with the path's state. Once the layer exists, adjust the path and its fill or stroke rather than paint over the shape.
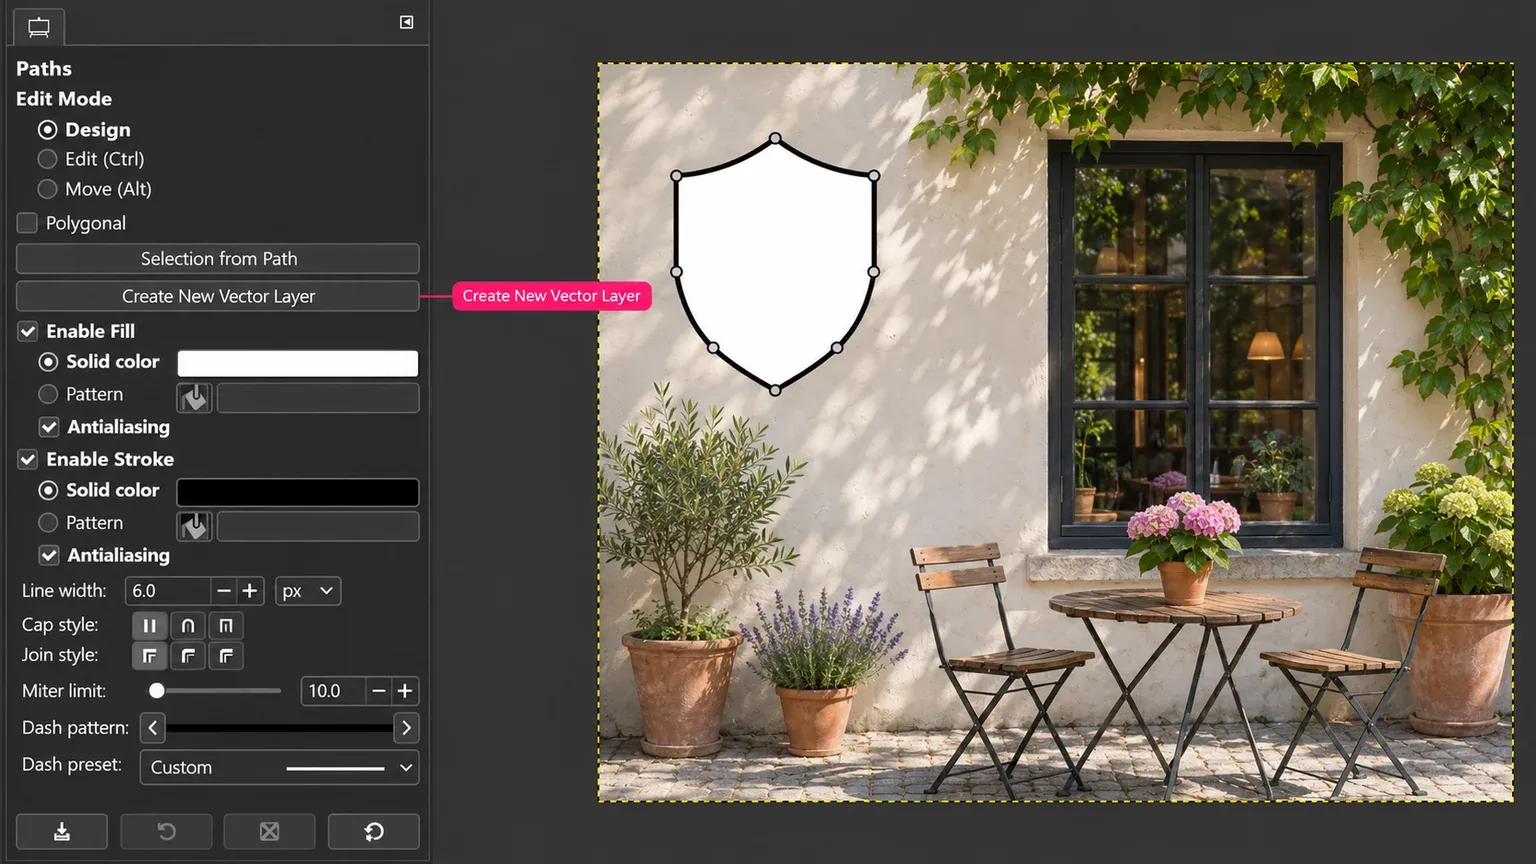
For a headline over a photograph, keep an ordinary text layer and use the editable text-outline controls. There is no reason to rebuild every caption in another editor. I'd move the work to Inkscape when the task becomes arranging several vector objects, reshaping lettering or maintaining a separate reusable drawing.
Before a destructive edit, GIMP 3.2 requires Layer > Rasterize for vector, text and link layers. Revert Rasterize restores the special layer type and clears the destructive edits. Save a separate working copy before using that reversal if the painted changes matter.
A supplied PNG: place the pixels or rebuild the shapes?
Importing a PNG into Inkscape doesn't automatically vectorise it. The imported raster stays an image object; the status bar identifies the selected object's type. Moving or clipping that object doesn't expose separate editable curves or letters.
If you only need the logo over a photograph, use the PNG in GIMP at suitable dimensions. For a scanned mark on white paper, remove the white background and retain a transparent PNG copy. Cleaning the background and rebuilding a vector outline solve different problems.
Choose tracing when the shape itself needs resizing or revision. Inkscape's Trace Bitmap guide explains how to create paths from a raster image. Inspect and refine those paths rather than assume they recover the original drawing. For a simple mark, manual tracing can also give you a deliberately controlled outline.
- Keep the supplied image as a reference and work in a separate SVG.
- Import and select the image, then choose Path > Trace Bitmap.
- Inspect the new curves independently of the original bitmap. Check holes, corners and letter spacing rather than judge only the combined view.
- Refine the nodes or redraw an unsuitable part. Simplifying a path can make it easier to edit but can also change the outline.
- Remove the source bitmap from a delivery copy if a vector-only file is required. Save, reopen and inspect that copy before handing it over.
Published tracing results show why that last check matters
A pinned three-fixture tracing run used Inkscape 1.4.4's headless object-trace command on a 10-core arm64 Mac with macOS 27. The repository is maintained alongside the competing converter pic2svg.com. Its output-structure figures are useful for inspecting the files; they don't establish a general speed or quality winner between Inkscape and GIMP.
| Input | Path elements | Embedded images |
|---|---|---|
| apple-touch-icon.png | 7 | 1 |
| og-image.png | 8 | 1 |
| synthetic-flat.png | 4 | 1 |
The three outputs contain a median of 7 path elements, ranging from 4 to 8, and one embedded image each. Those paths exist; the retained bitmap doesn't mean that tracing created no vectors. It means the delivery file still contains the original pixels as well. Check the file's objects and remove what the recipient doesn't need.
Choose the exchange format deliberately
| Format | Useful purpose | What to inspect |
|---|---|---|
| Inkscape SVG | Editable drawing master | Text, paths, embedded or linked images |
| Plain SVG | Recipient or renderer that requests simpler SVG | Appearance and any editing information removed |
| GIMP XCF | Editable GIMP composition | Layers, masks, effects and external link dependencies |
| PNG | Rendered graphic or cutout, including transparency | Final pixel dimensions and edge appearance |
| Agreed delivery or print document | Page size, fonts, transparency and recipient requirements |
Inkscape SVG stores extra editing information in its own namespace. Saving Plain SVG removes that extra Inkscape information. Keep the master and make a separate delivery copy when Plain SVG is requested. Open the delivery in the intended renderer and check the result, particularly fonts and effects.
GIMP can open an SVG as an image, or import its path geometry through the Paths dialog. Importing paths doesn't preserve the complete drawing's text, fills and effects as an Inkscape document. When opening a rendered SVG for a pixel composition, choose the needed output dimensions before you commit to the raster result.
Inkscape supports PNG export with alpha transparency. GIMP's PNG export also supports transparency, but PNG doesn't preserve the separate editing layers of the XCF. Keep the project alongside the finished image.
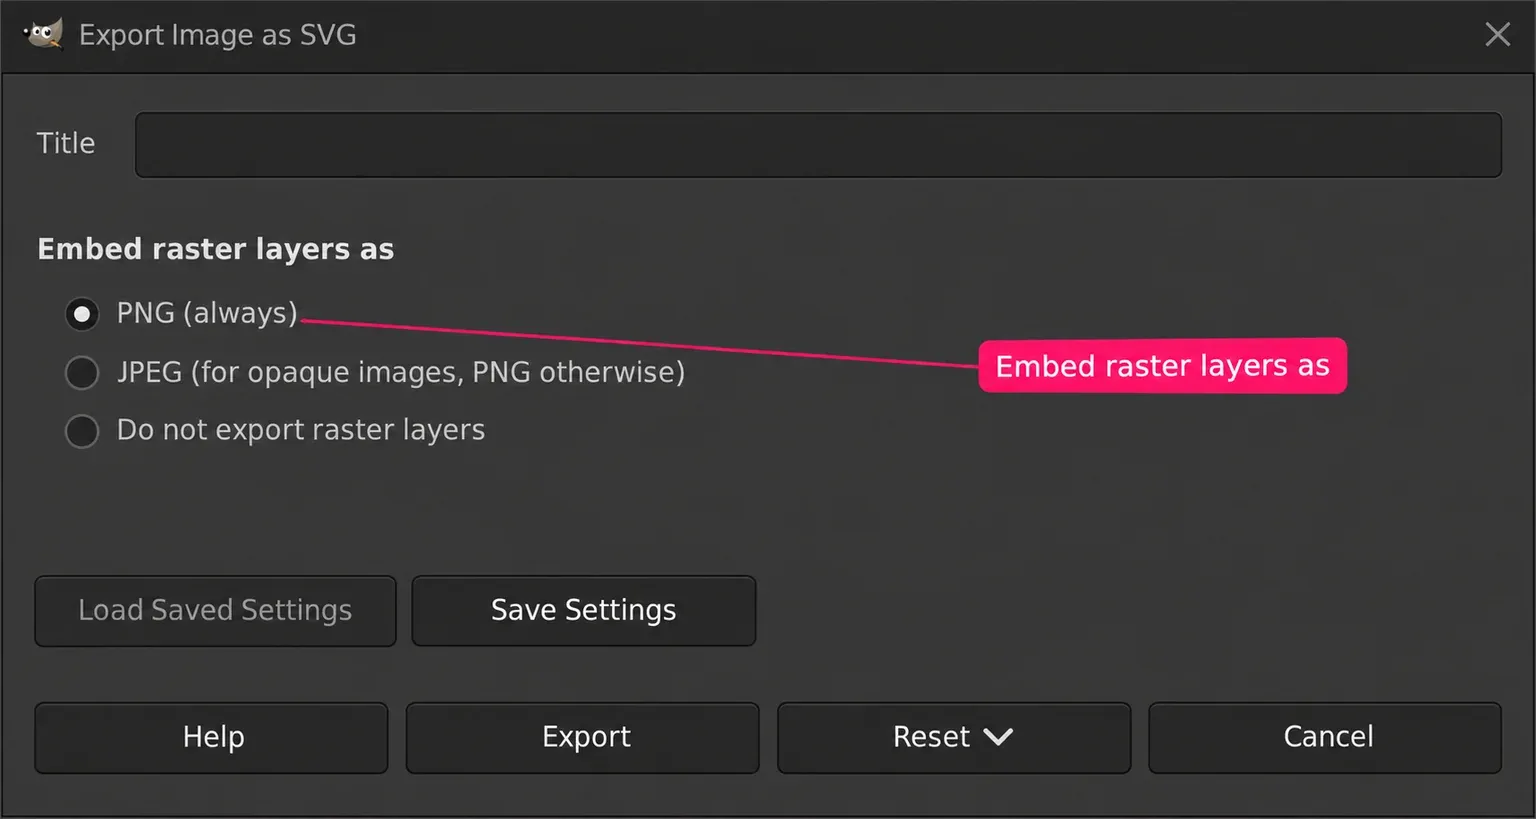
GIMP 3.2 can export SVG and PDF with raster and vector layer information. That doesn't convert the texture of a photograph into paths. Its SVG export control makes the distinction visible:
A PDF imported into GIMP is also a different handoff from an editable vector drawing. Its PDF import options open selected pages as separate Images or as Layers in one image, at the chosen dimensions and resolution. A page on a GIMP layer isn't a set of independently editable Inkscape objects.
For print, get the printer's requested file specification before exporting. A PDF extension alone doesn't establish the right colour space, page size or font treatment. If the printer requests CMYK or a particular PDF standard, arrange that conversion and validation before sending the job; don't assume either editor's default export meets it. Keep SVG and XCF for revisions.
Use both editors without losing the working files
An Inkscape logo inside a GIMP composition
For a logo that should update across compositions, use a GIMP 3.2 link layer. Put the SVG and XCF in a stable folder arrangement first; the external file must remain available. Relative links survive a move only when the same relative arrangement is preserved.
- Create and save the logo SVG in Inkscape.
- Open the photo composition in GIMP 3.2.
- Choose File > Open as Link Layer and select the saved SVG.
- Edit and save the external SVG in Inkscape when the logo changes.
- Check the updated GIMP layer's size, position and appearance, then save the XCF.
- Export the finished composition separately. If you move the project, include the SVG and check the link again.
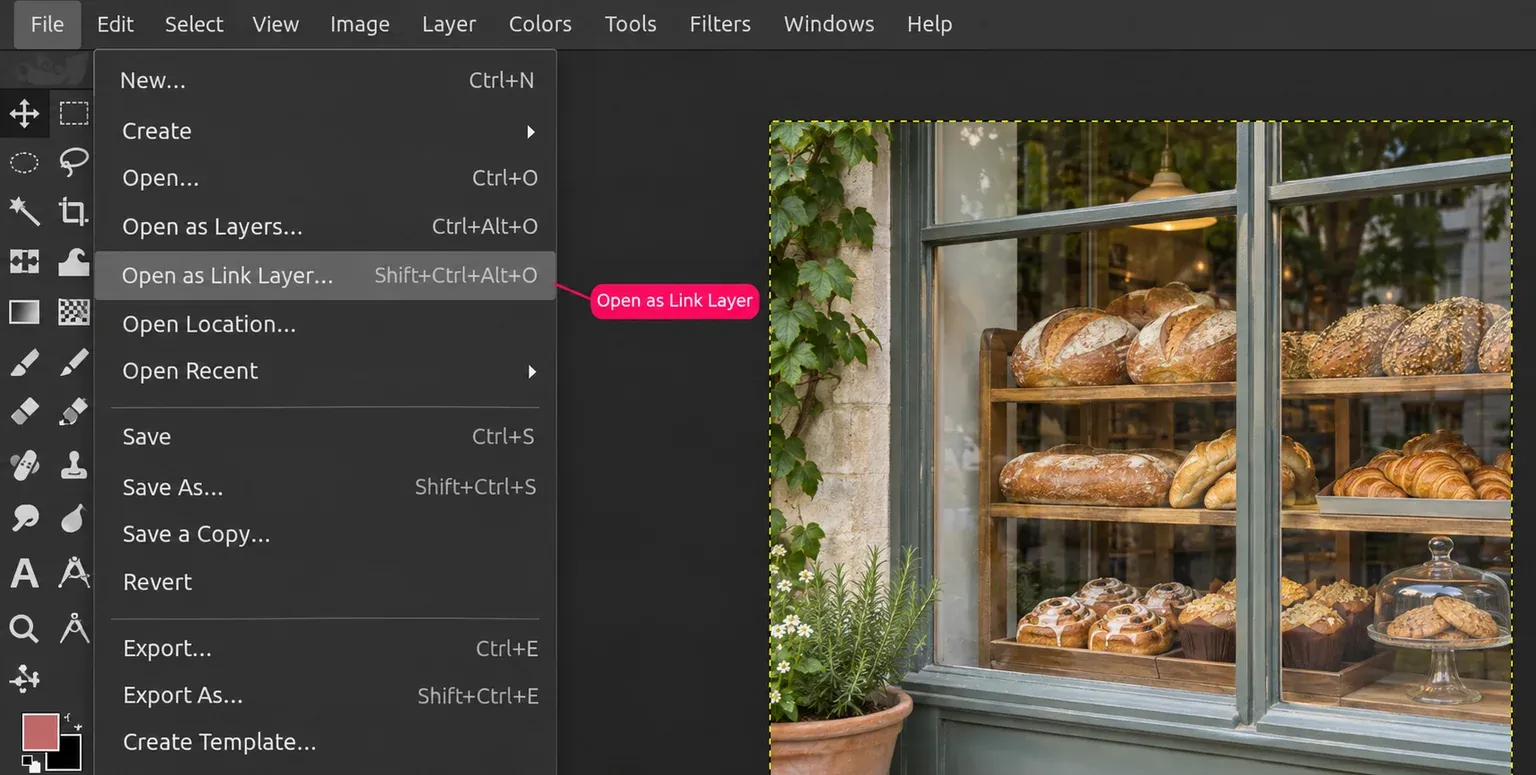
The Open as Link Layer command adds the externally updatable layer. If you only need a fixed placed logo, export a transparent PNG from Inkscape and use File > Open as Layers in GIMP instead. Keep the SVG separately; editing it won't automatically replace that ordinary PNG layer.
A GIMP cutout inside an Inkscape drawing
Finish the pixel correction and mask edge in GIMP, save the XCF, and export a PNG for the drawing. Import the PNG into Inkscape, then keep the lettering and other vector elements separate. This is useful when the page is mostly shapes and text with a photo as one component.
Choose deliberately between embedding and linking that PNG. Embedding stores the raster inside the SVG; linking records its location. A linked photo can disappear when the original file moves or the SVG goes to another computer. Embed it for a self-contained delivery, or include the linked image and verify the moved project. Embedding the photo still leaves it as pixels.
Which one should you learn first?
Start with the editor that owns your next necessary change. For a portrait, learn GIMP's layer selection, mask and export. For a reusable mark, learn Inkscape's objects, nodes and SVG saving. I'd postpone learning the second interface until a real handoff needs it, rather than turn a small image job into two complete courses.
Both are free, open-source desktop applications. Get GIMP through its official Windows, macOS and GNU/Linux download routes; Inkscape's platform and licence guidance covers its desktop packages and commercial use. Check the package for your operating system instead of treating an app with a similar name as an official mobile version.
For the first project, save the editable master, make one delivery copy and reopen it where it will be used. If the next likely revision is a curve or a word, keep the vector objects or text. If it is a mask edge or photo texture, keep the layered pixel project. The other GIMP alternatives and Affinity comparison cover choices that combine a different set of tasks.

Elena Morris
Elena Morris is the GIMP image-editing and compositing editor at TheGIMP.net. She writes about selections, masks and layers, restrained retouching, compositing and export.