Fade an image to transparency in GIMP with a gradient
Use a gradient mask to fade an image without erasing its pixels, then distinguish transparent output from a blend into white.
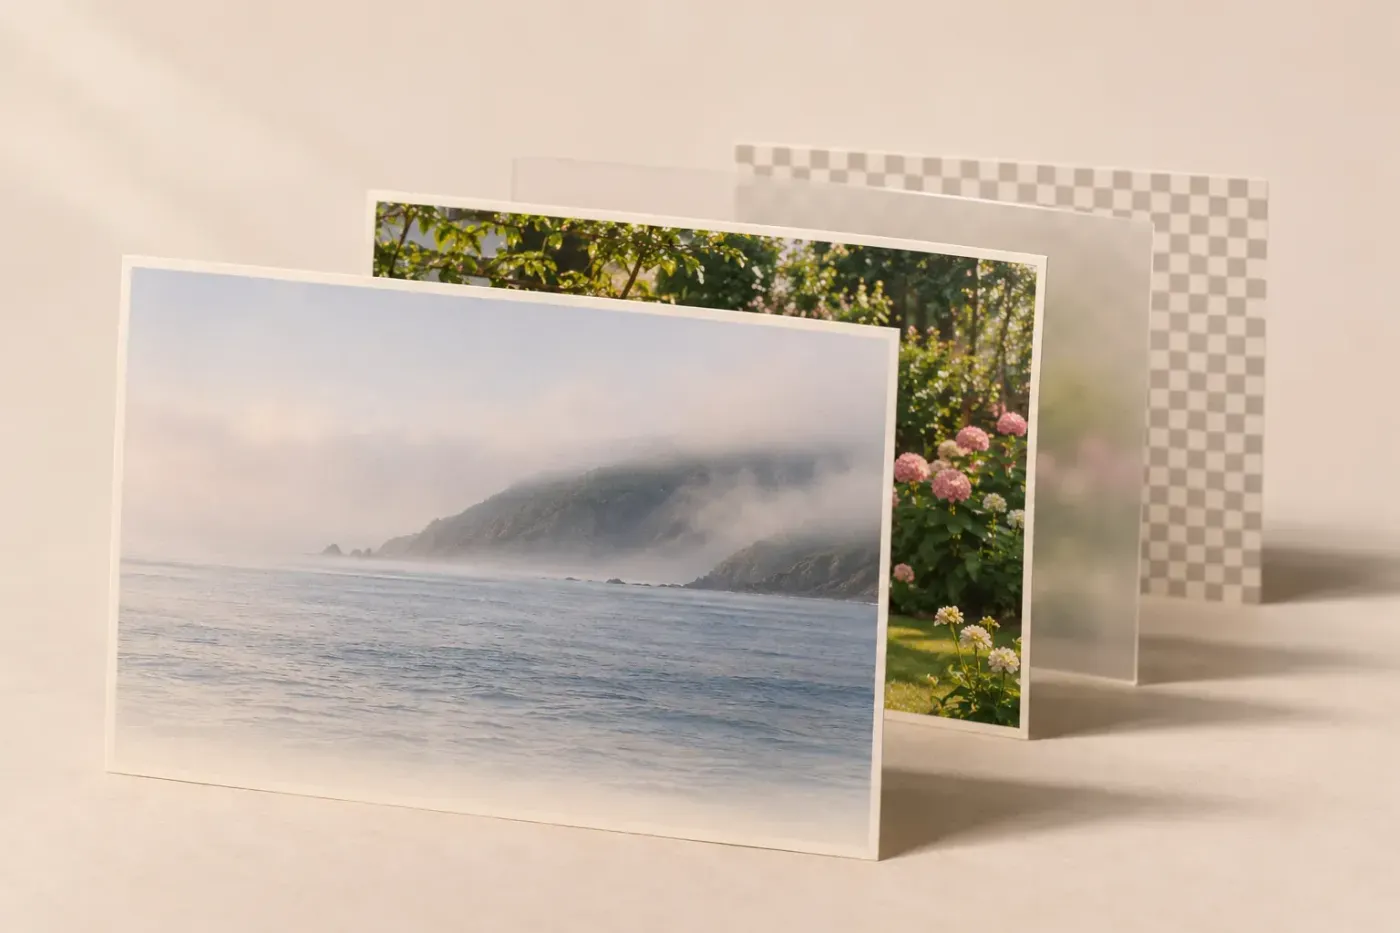
To fade an image to transparency in GIMP, add a white layer mask and draw a white-to-black gradient on the mask thumbnail. White preserves the image's visibility, black hides it and grey makes the transition. I'd choose a mask because you can revise the fade without erasing the photograph.
If you want to paint a black, white or coloured gradient over an image, use the colour-to-transparent method below. That creates new colour; the mask method changes where an existing image is visible.
Fade one side of a photograph to transparent
These steps use GIMP 3.2's English labels. Save a working copy as XCF and select only the image layer you want to fade. Open Windows → Dockable Dialogs → Layers if the Layers dialog is hidden. If the image already has a cutout mask, keep it and use the separate group mask instead.
- Choose Layer → Mask → Add Layer Masks. Select White (full opacity), leave Invert Mask unchecked and click Add. The photograph should still look the same.
- Click the new mask thumbnail to the right of the image thumbnail. A white border around the mask indicates that it is the editing target. Don't click the photograph thumbnail.
- If you have a selection worth keeping, save it before continuing. Choose Select → None so the gradient can cover the whole layer.
- Click the Toolbox colour swatches and set foreground to white and background to black.
- Choose Tools → Paint Tools → Gradient, or press G. Double-click the tool's icon if its options aren't visible.
- Set Gradient: FG to BG (RGB), Shape: Linear, Mode: Normal and Opacity: 100%. Leave Blend Color Space: Perceptual RGB, turn Reverse off, set Offset: 0 and choose Repeat: None (extend). Turn Instant mode off before drawing.
- Click where the photograph should remain fully visible, then drag towards the point where it should disappear. For a bottom-edge fade, drag downwards from above the bottom edge to that edge.
- Move the endpoints until the transition falls where you want it, then press Enter to finish. Keep the mask attached; you don't need to apply it to export the result.
The Gradient tool's settings and on-canvas controls determine the fade's shape and spread. In this setup the white starting end keeps the photograph visible and the black ending side hides it. A coloured lower layer may show through instead of the checkerboard: that's the same mask working over a different background.

Set the fade's direction, width and centre
A long drag spreads the change over more of the image. A very short drag compresses it into a narrow strip, which can look like a cut edge even with the correct gradient selected. Position the first endpoint where the fade should begin and the second where it should be complete. With None (extend), the end values continue beyond those limits.
For a left-to-right fade, drag horizontally from the side to retain towards the side to hide. For a top-edge fade, drag upwards. If the wrong side disappears, use Reverse or swap the endpoints. Keep the colour swatches as specified while diagnosing direction; changing the swatches and reversing the gradient together can undo each other's effect.
Hover along the active line to find its midpoint, then drag that midpoint to change the balance of the transition. Moving an endpoint changes where the fade starts or finishes; moving the midpoint changes the blend between them. Start with the ordinary two-end gradient before adding extra stops.
Instant mode removes the editable line when you release the mouse. With it off, the line remains available until you finish the operation. Enter commits the active gradient and Escape cancels its preview. Once committed, the mask is still editable, but don't expect to reopen the XCF and find that same active line: redraw the gradient on the mask or paint a local correction.
For a circular fade, change Shape to Radial. Drag from the centre you want to retain towards the outer radius where the image should become hidden. White is at the centre and black is outside the circle with this foreground/background setup and Reverse off. A radial fade is circular; it won't follow hair, a person's outline or all four sides of a rectangular photograph equally.
Make a black, white or coloured gradient to transparent
Use this route for a dark fade behind text, a coloured wash or a white overlay that disappears across the photograph. Put it on a separate transparent layer so its colour and strength can change without repainting the image.
- Select the photograph, choose Layer → New Layer and give the new layer a useful name such as Dark fade. Set Fill With: Transparency, use the image's dimensions and click OK. Confirm that the new layer is above the photograph.
- Select the new layer's image thumbnail. This time you are painting pixels, so there is no mask to select. Clear an unwanted selection with Select → None.
- Set the foreground colour to black, white or the colour you want. Choose the Gradient tool and the ordinary FG to Transparent preset, without Hard Edge.
- Use Normal, 100% tool opacity, Linear, Reverse off, Offset 0 and None (extend). Turn Instant mode off before dragging.
- Drag from where the colour should be strongest towards where it should disappear, adjust the line and press Enter. Then reduce the overlay layer's Opacity if the whole effect is too strong.
The New Layer dialog's Transparency fill matters here. Painting the same gradient over an opaque white layer leaves white showing through the transparent end. On an empty layer it leaves that end clear, revealing whatever is below.
FG to Transparent paints progressively less opaque foreground colour; it doesn't progressively erase the existing photograph. That's also why white-to-transparent over an already white mask can leave the mask white throughout. For the photo-fade recipe, the opaque white-to-black mask is easier to control because both visibility limits are explicit.
On the mask, keep the Gradient tool's opacity at 100% to write the intended black end fully. Lowering tool opacity blends the gradient with the mask's previous contents. On the separate colour overlay, lowering layer opacity afterwards is useful because the whole added wash should become weaker. These two opacity controls solve different problems.
Add a fade without losing an existing cutout mask
A fresh full-layer gradient can overwrite a carefully refined silhouette if you draw it on the same mask. I would keep the cutout and the fade separate: one describes the subject's boundary, the other describes how it disappears across the composition.
- Create a group with Layer → New Layer Group.
- Drag the masked photograph into it. Check that its row is indented beneath the group and that its original mask is still attached.
- Check the composition before adding the fade. Grouping can change how non-Normal blend modes interact with layers below; don't change the group's mode merely to force a different-looking result.
- Select only the group, add a White (full opacity) mask with Invert Mask off, then click the group's mask thumbnail.
- Draw the white-to-black gradient using the photo-fade settings above. Keep any background that must stay visible outside this masked group.
GIMP supports a mask on a group alongside masks on its child layers. The child's cutout remains in place while the group mask adds the fade. White on either mask doesn't restore pixels already erased from the photograph.
Arrange the group's contents before refining its mask. A group mask follows the combined bounds of its children: shrinking those bounds crops the mask, and expanding them fills newly added mask areas with black. If moving or resizing a child makes an edge disappear, inspect the group mask as well as the child's own mask.
Reveal another photograph, white or genuine transparency
To blend two images, put the second photograph below the masked one and make their intended overlap line up. The top image's black mask area reveals the lower image. Don't merge the layers just to see the blend; keep both pictures and the mask available for adjustment.
For a fade into white, add an opaque white layer underneath. If the photograph is inside a masked group, put the white layer outside that group. Leave it visible when delivering a white-backed image; hide it when delivering a transparent PNG.
To inspect the fade itself, temporarily hide the lower layers using their eye icons. You should see the checkerboard where the masked photograph disappears. An untouched duplicate below the faded copy can refill the missing area; an opaque duplicate above it can cover the edit altogether. Restore only the layers intended for the final composition.
Uniform fading is a different choice. The Layers dialog's Opacity control reduces the entire layer, including the portion you might want to keep solid. Use the mask for a spatial fade and layer opacity for an overall reduction.
Fix no fade, a hard edge or a black-and-white image
The photograph has been painted white or black. Undo that gradient and select the mask thumbnail before drawing again. Edit Layer Mask controls which thumbnail receives the edit. The image's colours should remain intact while the mask changes.
The canvas shows only the black-and-white mask. Turn off Layer → Mask → Show Layer Masks. A green mask border indicates this display mode. Showing the mask and choosing it for editing are separate controls; the photograph should return with the fade visible.
The mask has a gradient but the image stays unchanged. A red thumbnail border means the mask is disabled. Toggle Layer → Mask → Disable Layer Masks again to enable it, then check for an opaque duplicate. Hide lower layers briefly to see whether they are filling the transparent part.
Only a rectangle or small patch changes. An active selection limits where the gradient can paint. Preserve a selection you need, choose Select → None and retry. Check the layer's own bounds too: its mask can't extend the photograph beyond its pixels.
The transition is abrupt or mostly solid. Lengthen the drag, restore Offset to zero and reselect the ordinary FG to BG (RGB) preset for the mask. Avoid Hard Edge presets. Edited gradients can retain extra stops or a Step blending function that creates a hard transition; GIMP can retain an edited Custom gradient across sessions. Selecting the stock preset gives you a predictable starting point.
The fade repeats in stripes. Check Repeat: use None (extend) rather than Sawtooth wave or Triangular wave. If the fade stops unexpectedly outside the line, check that you haven't chosen None (truncate).
The whole image vanishes as soon as you add the mask. Check the initial mask: black hides the layer, and Invert Mask reverses the selected initial contents. On a newly added mask with no useful work to retain, undo its creation and add a white one with inversion off. Don't replace a finished cutout mask to fix this.
Keep the editable mask and export a transparent PNG
Save the layered XCF as your working file. Use File → Export As with a .png filename for a delivered transparent fade. PNG supports alpha transparency, including the partially visible transition. JPEG doesn't retain that transparency.
In the PNG export dialog, keep the image-based default for Pixel format, or choose an RGB or grayscale format with an alpha channel. The PNG pixel-format options also include choices without alpha, which cannot retain the fade as transparency. Finish the export after checking that setting.
Before exporting, hide any opaque background or backup copy that should not be part of the deliverable. Keep the masks enabled and the photograph view active. Don't flatten the transparent version: flattening removes transparency, and you don't need to apply the masks beforehand. The transparent-background workflow covers alpha and background-removal checks if the photograph still contains an unwanted backdrop.
A viewer may display a transparent PNG on white, so its white page alone doesn't prove that transparency was lost. Reopen the exported PNG in GIMP and place contrasting light and dark layers underneath it. Look for an opaque rectangle, an unfinished edge or an accidental second image, then inspect the fade at its intended display size and at 100% zoom.
If the transition needs moving, return to the XCF mask and change it there. Keep the editable photograph and the exported delivery file as separate files.

Elena Morris
Elena Morris is the GIMP image-editing and compositing editor at TheGIMP.net. She writes about selections, masks and layers, restrained retouching, compositing and export.