What Resynthesizer does in GIMP and how to use it
Heal Selection fills an object selection from nearby texture on the same layer. Choose its sampling direction, protect the original and check the repaired edges.
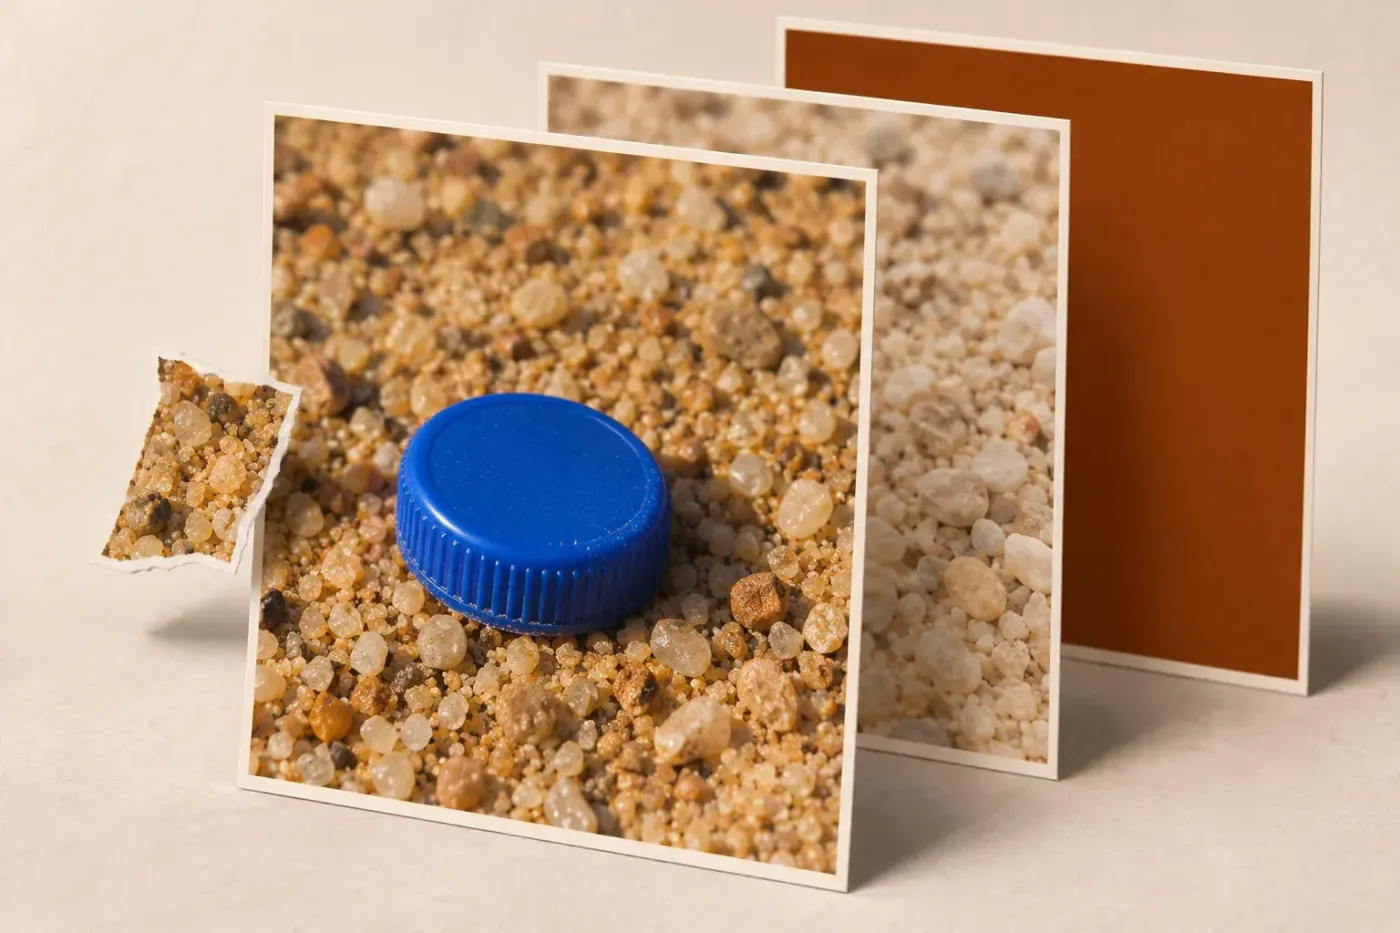
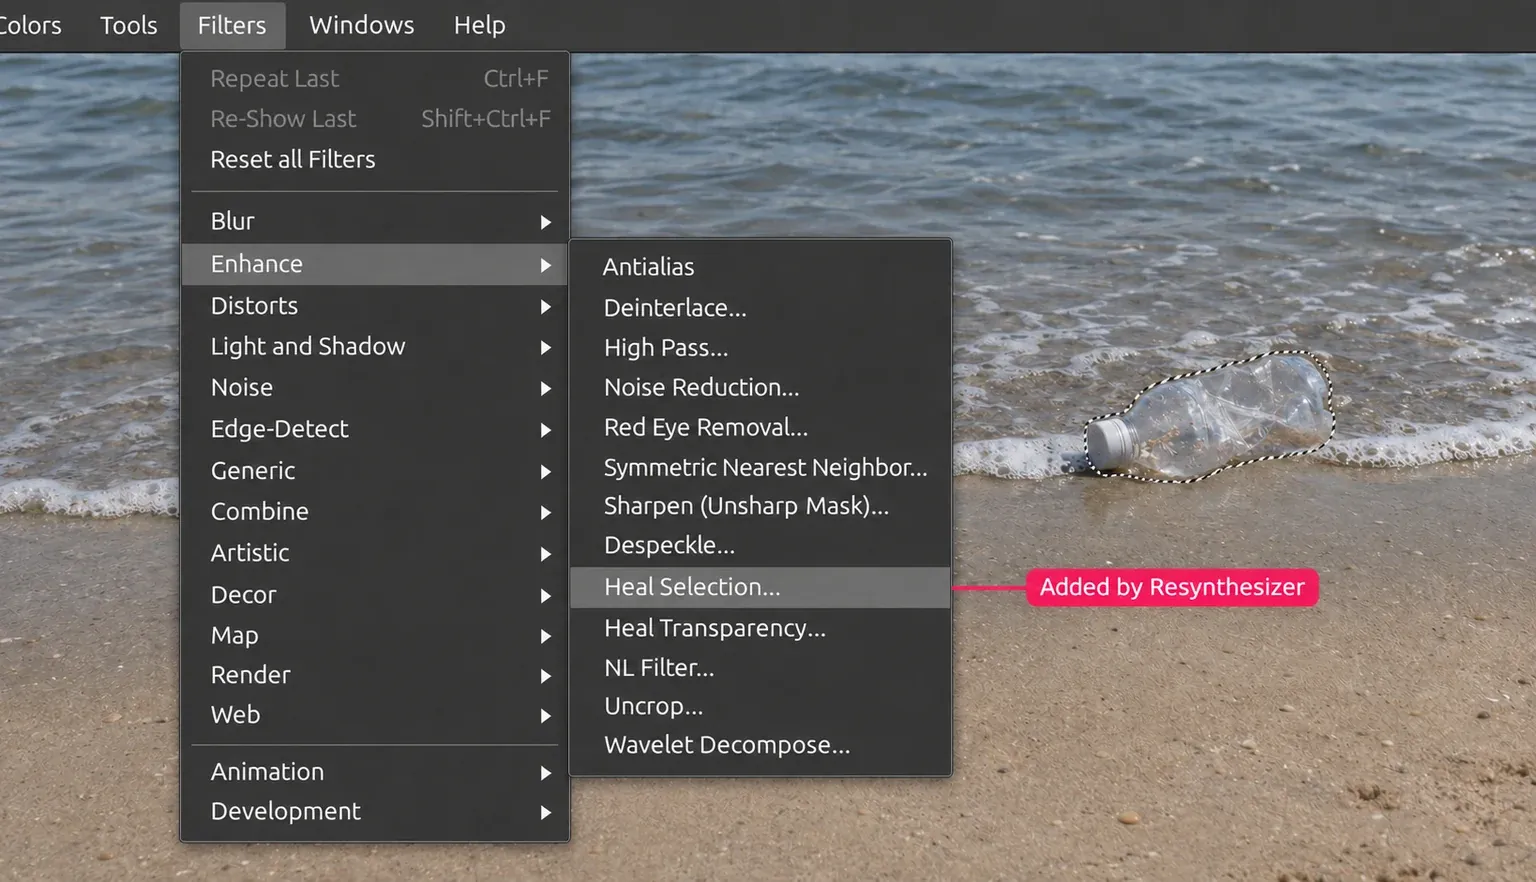
Resynthesizer is a free, separate GIMP plug-in suite that builds texture from pixels already present in an image. Its best-known command, Filters > Enhance > Heal Selection..., replaces a selected object with material from around it. I'd use it for litter on sand or a bin on grass, where there is enough matching texture nearby; a railing, face or sign needs closer control over what replaces the missing detail.
The Resynthesizer 3.0.1 release supports GIMP 3.0 and later. Installing GIMP alone doesn't add these commands. If you're looking for the download or the correct folders, follow the Resynthesizer installation guide for your GIMP build; the guide below explains what to choose and how to get a useful repair.
What it can fill, and what it cannot recover
The engine compares small neighbourhoods of pixels in a source with the area being filled, then assigns suitable source colours to the target. That patch-matching process can extend irregular texture without simply repeating one rectangular stamp. It doesn't know what an eye, a word or a fence is supposed to look like.
This is the kind of operation often called content-aware fill. It isn't a prompt-based image generator, and its output is a plausible replacement rather than recovered evidence of what was behind the object. Grass, gravel and distant water are sensible candidates. A readable number plate, a missing eye or a precise brick joint cannot be trusted to emerge correctly from surrounding texture.
I'd decide from the background before selecting the object. If the surrounding pixels contain the material the repair needs, try Heal Selection. If the important feature is a straight edge or a particular shape, plan a controlled Clone repair. When the photograph's meaning depends on a hidden detail, use another photograph or change the composition.
Resynthesizer's commands in GIMP
Resynthesizer is the underlying engine, while the menu commands prepare a source and target for different jobs. The suite's command guide covers these uses; the paths below follow the version 3 scripts.
| Command | What it changes |
|---|---|
| Filters > Enhance > Heal Selection... | Replaces a selected area from its surroundings on one selected layer. |
| Filters > Enhance > Heal Transparency... | Fills transparent pixels from nearby texture and removes that layer's alpha channel. |
| Filters > Enhance > Uncrop... | Enlarges the canvas and synthesises a border around the photograph. |
| Filters > Render > Texture... | Creates a new texture image from the source image or selection. |
| Filters > Map > Style... | Transfers the appearance of a source image to another image. |
| Edit > Fill with Pattern Seamless... | Fills an area with synthesised texture from a chosen pattern. |
| Filters > Map > Resynthesize... | Exposes the engine's source, filling order, tiling and matching controls. |
For object removal, use Heal Selection first: it prepares the surrounding source automatically. The Resynthesize control panel is for choosing a source and controlling the engine directly. Old instructions may also list Sharpen by Synthesis or Enlarge and Sharpen by Synthesis; the project marks those commands obsolete in version 3.
Prepare one photo layer and protect the original
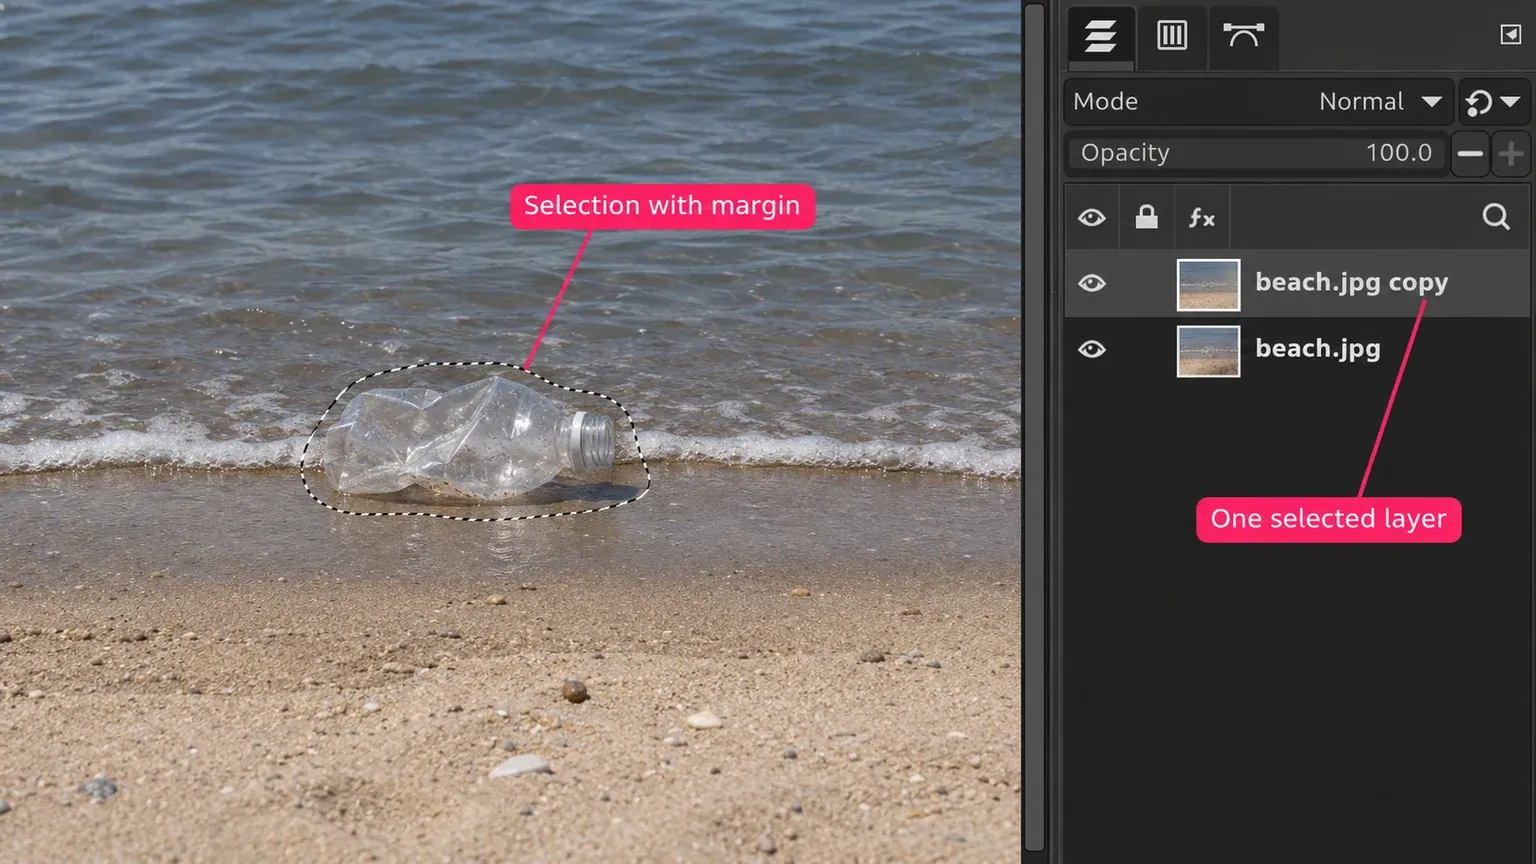
Choose the photo's pixel thumbnail in the Layers dock, not its mask, and make it the only selected layer. Heal Selection samples and repairs that one drawable. It has no Sample merged option: a blank layer above the photograph won't supply the picture underneath. The Heal Selection script uses the corresponding selected drawable in a temporary image copy as its source.
Choose Layer > Duplicate Layers, then select only the duplicate. Keep the original below it and save an XCF. The fill changes pixels on the duplicate; preserving the original lets you compare or replace a failed repair later.
Check precision before using the suite. Resynthesizer processes pixels internally at 8-bit precision, even when the document uses 16 or 32 bits. The document retains its encoding, but the filled area receives lower-precision colour values. The project's bit-depth explanation makes that distinction explicit. Check Image > Encoding; I'd choose another method if preserving the image's higher precision is a requirement.
For an indexed image with an unordered colour palette, the same project guidance recommends converting to RGB before resynthesising. Use Image > Mode > RGB on a working copy. Being able to run the filter on an indexed or high-precision document doesn't guarantee the result has the colour accuracy you need.
Remove a small object with Heal Selection
- Select everything that should disappear. On the duplicate photo layer, use Tools > Selection Tools > Free Select. Include the object, its shadow and any reflection, with a small margin. Close the outline and press Enter to confirm it. Unwanted pixels left immediately outside can become source material.
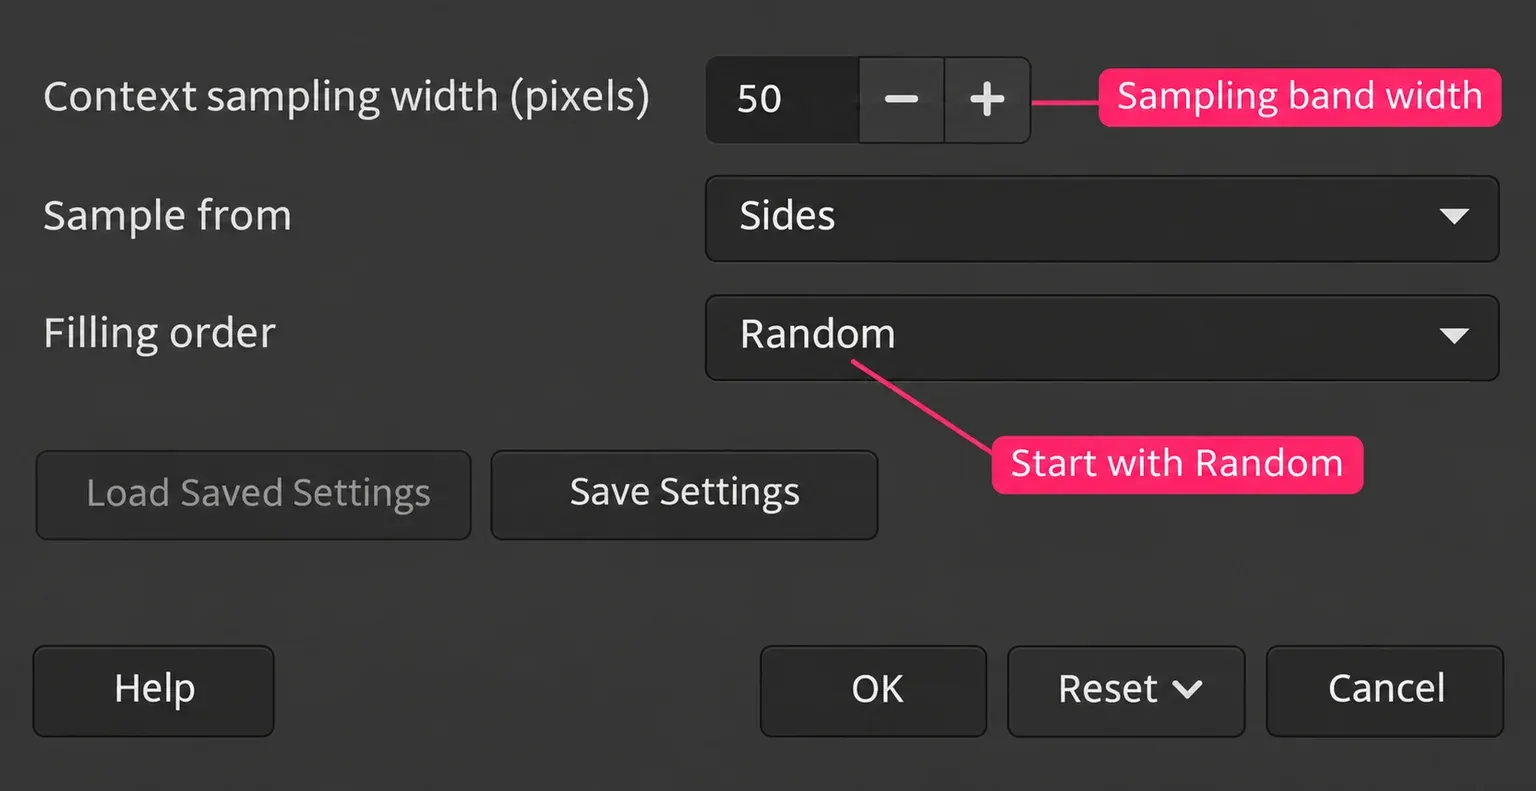
- Open Filters > Enhance > Heal Selection... Start with Context sampling width (pixels) at 50, the script's default. Choose a Sample from direction that contains matching background; the next section explains the three choices.
- Leave Filling order at Random for the first attempt. Confirm with OK and let the operation finish. Inwards towards center and Outwards from center change the order in which the area is filled; they don't add better source material.
- Deselect and inspect. Choose Select > None. At 100% zoom, look for repeated clumps, a halo around the old selection, broken lines and traces of the shadow. Also check the image at its intended display size: a repair can have convincing grain but still bend the shoreline.
- Undo a failed fill before changing its inputs. Use Edit > Undo to return to the pre-fill pixels. If deselection was the last action, undo that first, then the fill. Adjust the source direction, width or selection and run the command again.
- Save the project and export a new image. Keep the layered XCF, then use File > Export As... for a JPEG or PNG under a new filename. XCF preserves the working structure; exporting produces the image for sharing. Reopen that export and check the repaired area before replacing any delivered file.
Choose the right source pixels
Heal Selection takes its source from a band around the selection, excluding the selected area itself. Context sampling width (pixels) controls how far that band extends. The current script defines both the band and the directional restrictions:
- All around uses the surrounding band. Start here when the target sits inside one fairly consistent texture, such as sand.
- Sides uses the strips to the left and right, restricted to the selection's height. I'd start here when an object crosses a horizontal shoreline: the same-height pixels contain the matching sand, foam or water.
- Above and below uses the strips above and below, restricted to the selection's width. Try it when a vertical division needs matching material from the same column.
The width is a distance in image pixels, not a percentage or a quality setting. Fifty pixels can be a useful first attempt, but a large selection may have too little source in that band. Increase the width to reach more suitable texture. Narrow it when the wider band reaches a person, post or different surface. Near an image edge, part of the nominal band lies outside the photograph and supplies nothing.
Source direction matters more than repeatedly accepting the same wrong fill. In Pat David's published walkthrough, All around brought part of a post into the repair; Sides restricted the source to the rock beside it. That older example demonstrates the decision, while the current script confirms the source shapes.
If one object crosses several surfaces, repair those parts separately. For a post crossing sky and a wall, select the wall section first and restrict its source to the wall; then handle the sky section. Keep the surviving part of the post outside the sampling band where possible. Directional sampling helps supply appropriate material, but it doesn't guarantee a straight rebuilt edge.
Fill transparent holes, extend edges or make a texture
Transparent gaps need Heal Transparency
Ordinary Heal Selection doesn't make transparent target pixels opaque. For small holes or thin transparent edges, use Filters > Enhance > Heal Transparency... on a duplicate layer that contains enough visible texture. The Heal Transparency script finds the transparent areas itself, fills from the surroundings and removes the selected layer's alpha channel. It isn't a way to keep part of that layer transparent.
Save the XCF first, select only the intended layer and open the command. Start with a suitable sampling width; try an inward filling order for holes or an outward order for thin outer edges. Inspect the entire layer afterwards, including areas you intended to remain transparent. I wouldn't run it on a cut-out that must retain its transparent background.
Uncrop adds plausible border pixels
Filters > Enhance > Uncrop... enlarges the canvas around the image and synthesises an outer border. Its version 3 script recommends small, natural edges and undoing a real crop when possible. Use Undo or reopen the original to retrieve actual cropped pixels. Uncrop cannot recover them from a flattened crop.
For a modest extension of grass or sky, save a separate XCF before trying it on one selected photo layer. Check the new canvas dimensions and the transition at every edge. With an alpha-bearing layer the new border can remain transparent; the dialog's anti-erase option controls making that border opaque. Reject invented branches, bent building edges or obvious repeats rather than treating a larger canvas as proof of a successful extension.
Texture creates another image from a sample
To make more of a usable texture, select a clean patch on one photo layer and choose Filters > Render > Texture.... Set Ratio of size of new image to source selection; the Texture script applies the ratio to both dimensions. A ratio of 2 makes a 100 × 100 pixel selection's output 200 × 200 pixels; it synthesises additional texture rather than enlarging the original details.
Enable Make new image edges suitable for seamless tiling if you want to repeat the resulting tile. Inspect several repeated copies for visible joins and recognisable repeated marks before using it as a background. With no selection, the source is the whole image. For filling an existing area from a pattern instead, choose Edit > Fill with Pattern Seamless...; that command's Pattern chooser supplies the source.
Fix a poor result before changing the installation
Another object appears in the fill. It was available in the source. Undo, include unwanted shadows or remnants in the target selection, then restrict the direction or narrow the sampling width. Don't leave the same contamination in the band and expect filling order to remove it.
The fill repeats a clump or turns into a smeared patch. Check whether the band contains enough clean matching texture. Try a wider band only if it reaches better material. Break a complicated target into smaller repairs. When no suitable texture exists nearby, changing the settings cannot supply it.
A rail, horizon or brick joint bends. Use GIMP's Clone tool to copy a chosen source along the edge. The Heal tool blends a chosen source with the destination's surroundings, which suits small marks and texture transitions. These are built-in tools, so they also provide a fallback when a compatible Resynthesizer build is unavailable. The local Clone and Heal repair workflow covers source placement and short controlled strokes.
The photograph is unchanged or the mask changes instead. Check the selected drawable. Return to the photo's pixel thumbnail, select only that layer and confirm that the target selection overlaps its actual pixels. Heal Selection does not gather the visible composite from other layers.
“You must first select a region to heal.” Draw and confirm an area to replace; merely opening the filter isn't enough. “Heal Selection will only heal one drawable.” means several drawables were selected and the script proceeds with the first. Select only the intended photo layer and retry. Both messages come from the script's input checks.
If Heal Selection is missing or crashes
First look under Filters > Enhance with a photo open. You can also use Help > Search and Run a Command to search for Heal Selection. A missing command points to discovery or installation; a command that opens and then reports an engine error is a different problem.
“Procedure not found” naming plug-in-resynthesizer means the engine hasn't loaded. Heal Selection's script alone cannot perform the repair. The current installation specification places each version 3 plug-in in its own matching subdirectory of a plug-ins directory; this includes the Scheme wrappers and the separate engine. Use the paths configured by your GIMP installation rather than a folder copied from an old tutorial.
“Returned no value”, “terminated without return values” or a crash is not the same as an absent engine. Save your work, then check the build, operating system, architecture and package format against the distributor's instructions. Record the complete error and GIMP/Resynthesizer versions if you need support. Don't replace random DLLs or switch off security protection to make an unknown archive run.
For Linux Flatpak GIMP, use its matching extension: the Flathub recipe packages Resynthesizer 3.0.1 on branch 3. A host-system plug-in or an old GIMP 2 extension isn't interchangeable with that package. Windows has community builds and reports of use on GIMP 3.2, while the upstream project does not supply a tested Windows build. Reports from individual installations don't establish that every archive or configuration will work.
On macOS, the MacPorts gimp-resynthesizer package depends on GIMP 2; it isn't a drop-in add-on for GIMP 3 from gimp.org. Old GIMP 2 Python plug-ins and current GIMP 3 Scheme plug-ins follow different interfaces. Match the build before moving files, and keep a working editor in place if a manual Clone or Heal repair will solve the photograph.

Elena Morris
Elena Morris is the GIMP image-editing and compositing editor at TheGIMP.net. She writes about selections, masks and layers, restrained retouching, compositing and export.