Add an image as a layer in GIMP: resize, move and blend
Add a photo or logo to another image, choose between importing and pasting, fix sizing and canvas problems, and preserve the layers for later edits.
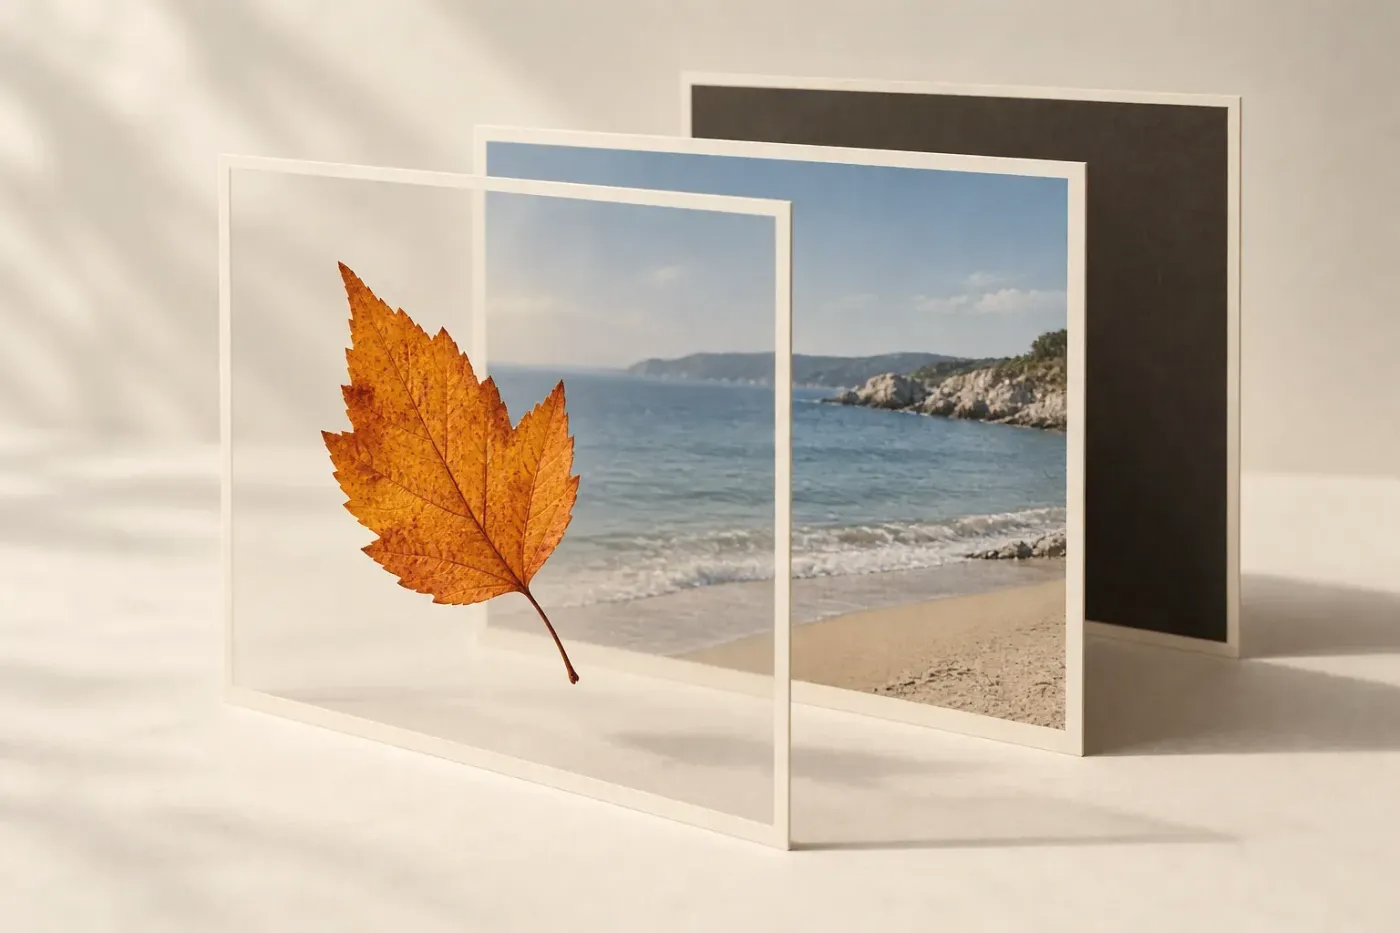
To add an image as a layer in GIMP, open the base picture, make its tab active and choose File > Open as Layers…. Select the second image and press Open; its layers join the top of the current stack, so you can resize and move them separately from the base. I'd use this route for a saved photo or logo because it avoids clipboard selections and doesn't require an empty layer first.
Add a saved picture to the correct image
- Choose File > Open… and open the picture that will be the background.
- If several images are open, click the background picture's tab. This is the destination for the import.
- Choose File > Open as Layers…. Its documented default shortcut is Ctrl+Alt+O.
- Select the file to add and press Open.
- Open Windows > Dockable Dialogs > Layers if the layer list isn't visible. Check that the imported picture appears above the background.
An opaque photograph can cover the entire background. Click the imported layer's eye icon to hide it briefly: the original should still be underneath. Turn the eye back on before sizing the added picture. Importing doesn't automatically cut a subject out of its background.
A layered source, such as an XCF, brings in its layers rather than one flattened preview. Check the resulting stack before moving anything; a source made from several parts needs a different selection from a single PNG logo. Rename the important rows to describe their role, such as Inset photo and Background, so later edits have an obvious target.
If the added picture turns grey or loses colours
Check the destination image's colour mode. Grayscale keeps brightness values, while Indexed restricts colours to a palette. An imported layer adopts the destination's mode, so a full-colour source can lose colours even when its pixel dimensions stay unchanged.
For a full-colour composition, choose Image > Mode > RGB in the destination before importing. If the added layer has already lost its colours, replace that layer with a fresh import from the original after switching to RGB. Converting the reduced result back to RGB won't recover the discarded colour information.
Drag a file onto the picture, not the Toolbox
You can drop a file from your file manager onto an open image to add its layer or layers. Dropping onto the Toolbox or an empty image window opens a separate image instead. If the second picture keeps appearing in another tab, use Open as Layers with the destination tab selected; you don't need to merge the two tabs afterwards.
Copy from another open image
Copy and paste is useful when you want a selected object or the visible result of a layered source. Before copying, decide what the destination should contain:
- One complete layer: select that layer in the source image. Choose Select > None if an old selection is still active, then Edit > Copy. Copy uses the selected layers and current selection; with no selection it copies the whole current layer.
- A selected area: make the intended selection on the source layer, then copy. A leftover small selection explains why only a fragment arrives.
- The appearance of several visible layers: clear any selection first if you want the whole composition, then choose Edit > Copy Visible. It combines their appearance into one clipboard layer, so the separate source layers won't remain editable in the pasted copy.
Switch to the destination tab, select the row above which you want the copy, and choose Edit > Paste. In GIMP 3, ordinary Paste creates a new layer above the active layer. Check its row in the Layers dock before transforming it. If you need all the source layers separately, save the source as XCF and use Open as Layers instead of Copy Visible.
Older instructions often finish by anchoring a floating selection. That isn't a required step for ordinary paste in GIMP 3. If you deliberately used Paste as Floating Data, or you're following a GIMP 2.10 workflow and see Floating Selection in the dock, create a new layer from it to keep it independent. In GIMP 2.10, Layer > New Layer… becomes To New Layer when a floating selection is present. Anchoring attaches the selection to the underlying drawable, which removes the separation you're trying to preserve.
Resize the added layer without shrinking the background
Select only the added picture's row. Several highlighted rows mean several layers are selected; GIMP supports that, but Layer > Scale Layer… requires a single layer. For a photo inset or logo, I'd set the width numerically because the intended output size is easier to check than a dragged corner.
- Choose Layer > Scale Layer….
- Set the dimension unit to px.
- Keep the chain beside Width and Height connected so the proportions stay linked.
- Enter the required width or height and confirm the other dimension follows.
- Leave a suitable interpolation method selected, press Scale, and inspect the layer against the background.
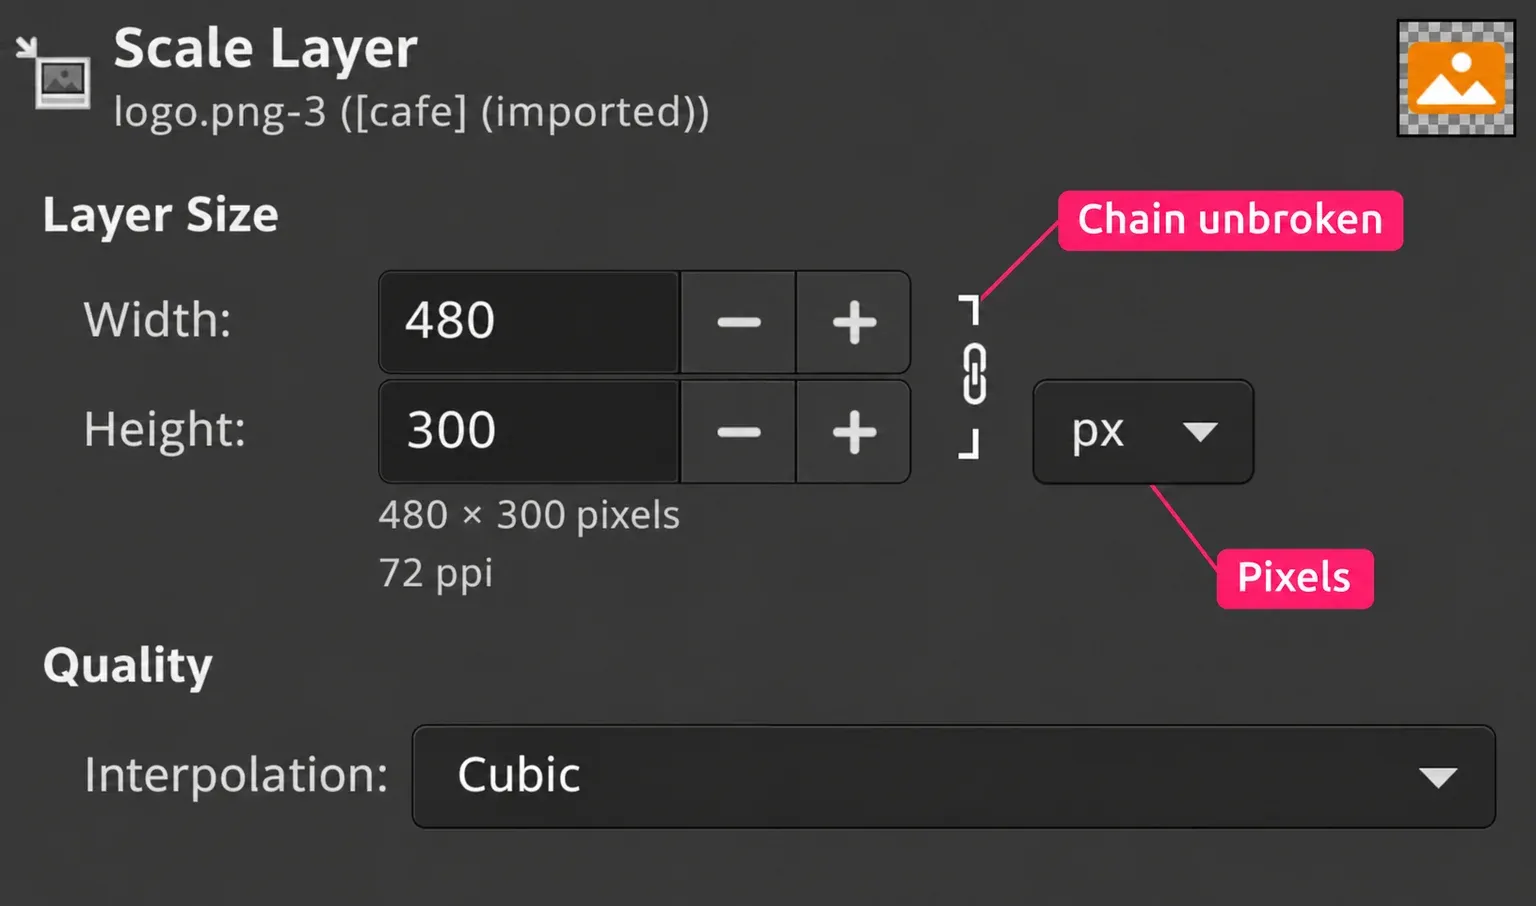
For example, a 1600 × 1000-pixel source scaled to 480 pixels wide becomes 480 × 300 pixels with the chain connected. Those are example dimensions, not a recommended size for every image. Choose the size for the composition you're making.
Image > Scale Image… changes the whole image, so the inset remains the same proportion of the background. Use the layer command when only the added picture should change. The layer's pixel dimensions can differ from the canvas dimensions; a large import hasn't necessarily been resized or damaged just because only its centre is visible.
Interpolation estimates pixels when scaling; it can't recover detail missing from a small original. I'd keep the original file and scale a fresh import to the intended size rather than repeatedly shrink and enlarge the same raster layer. For more control over the sizing choices, follow the single-layer resizing steps.
Move the inset and check its order
With only the inset row selected, choose the Move tool, set its target to Layer, and select Move the selected layers in Tool Options. Drag the inset into position. This avoids picking the background through a transparent part of a logo.
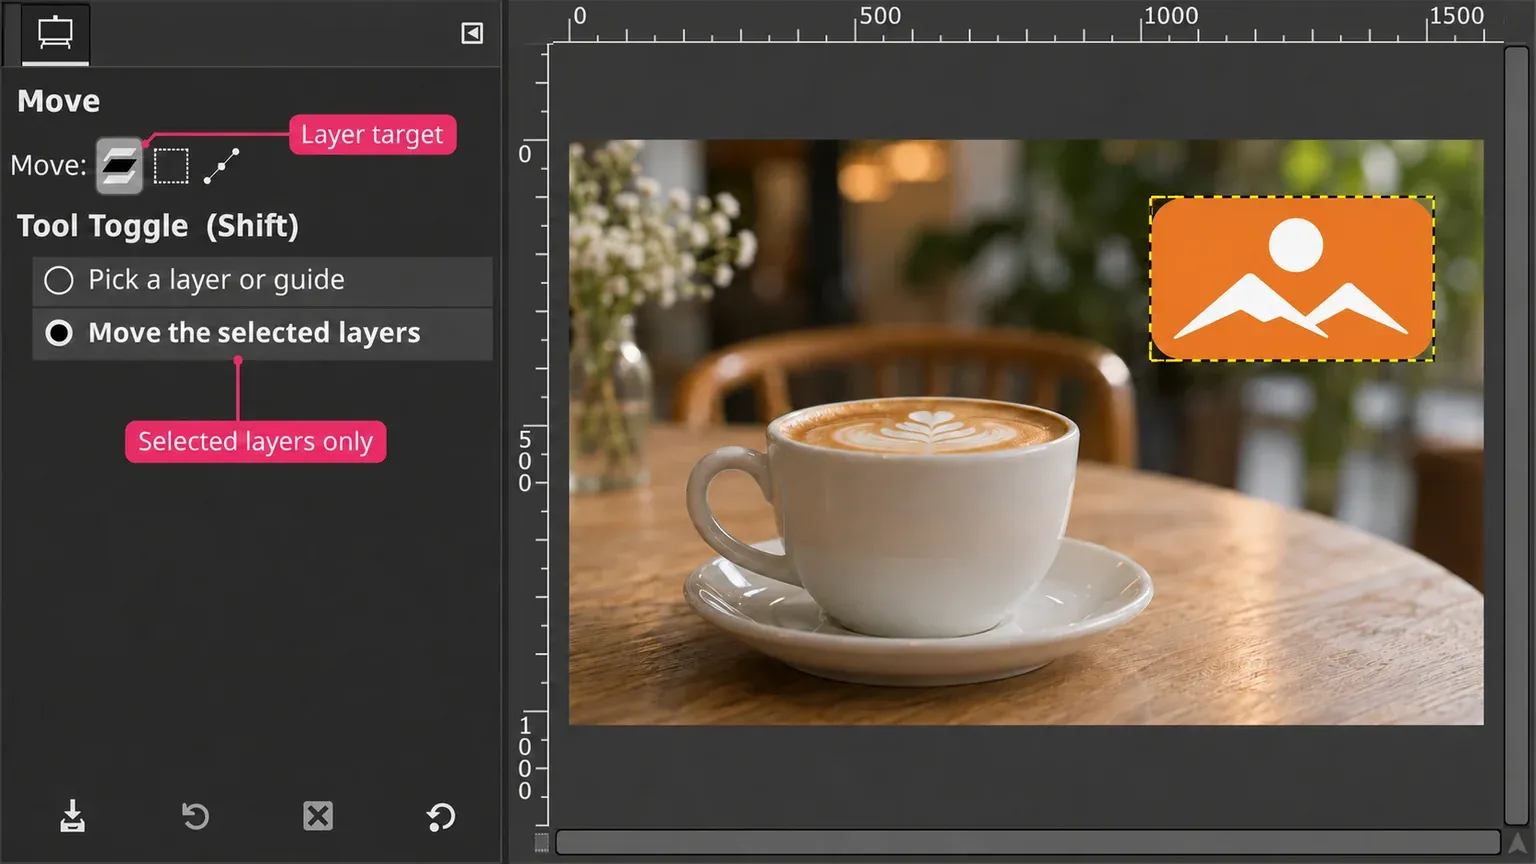
If the background moves too, inspect the highlighted rows and whether you've selected a layer group. Moving a group moves its contents together. If nothing moves, check Lock position and size on the intended row. When only the selection outline moves, the Move target is set to Selection rather than Layer.
The layer list also controls overlap. A higher opaque layer obscures a lower one. Drag the added picture's row above the row it should cover, keeping it in the intended group if the project uses groups. Watch the eye icon and the image itself as you change the order; don't flatten the stack to make the inset stay in place.
Choose whether the picture must fit, or the canvas must grow
The canvas boundary and layer boundary are different. A layer can extend outside the visible image area, and importing a larger one doesn't automatically enlarge the canvas. Its off-canvas pixels are clipped from the visible composition.
- Keep the finished image the same size: scale the added layer down and move it inside the canvas. This is the usual choice for an inset photo or corner logo.
- Keep the imported layer's full pixel size: choose Image > Fit Canvas to Layers. The canvas expands to contain all layers, so check the new overall dimensions and any newly exposed space.
- Use a specific larger canvas: choose Image > Canvas Size… and set the dimensions and placement. With Resize layers: None, this changes the visible area without resampling the pictures.
Growing the canvas doesn't stretch the background photo to fill it. Newly exposed areas can be transparent. Check those areas before export, particularly if you need a solid background. If the goal is a fixed-size composition, enlarging the canvas to rescue an oversized inset usually creates another sizing job.
Remove the rectangle or blend an edge
A PNG can contain transparency, but its file extension doesn't prove that it does. A white rectangle around a logo is still picture content. Adding an alpha channel enables transparency; it doesn't identify and remove white pixels for you. Use the white-background removal method for a flat mark, or a subject cutout for a photograph.
To blend only part of an added image, I'd use a mask because you can restore an edge after seeing it against the new background. Lowering Opacity fades the whole layer. Mode changes how its colours combine with the layers beneath; neither is a substitute for choosing which pixels should remain visible.
- Select only the added layer. If a selection is active and you want to paint freely across the mask, choose Select > None.
- Choose Layer > Mask > Add Layer Masks…, select White (full opacity), and press Add.
- Click the mask thumbnail beside the picture thumbnail. Its white border shows that the mask is active.
- Use Paintbrush with black to hide unwanted areas. Use a soft brush for a gradual blend; a crisp logo boundary needs a more controlled edge.
- Paint white on the mask to reveal hidden areas again. Click the picture thumbnail before editing the picture's colours or pixels.
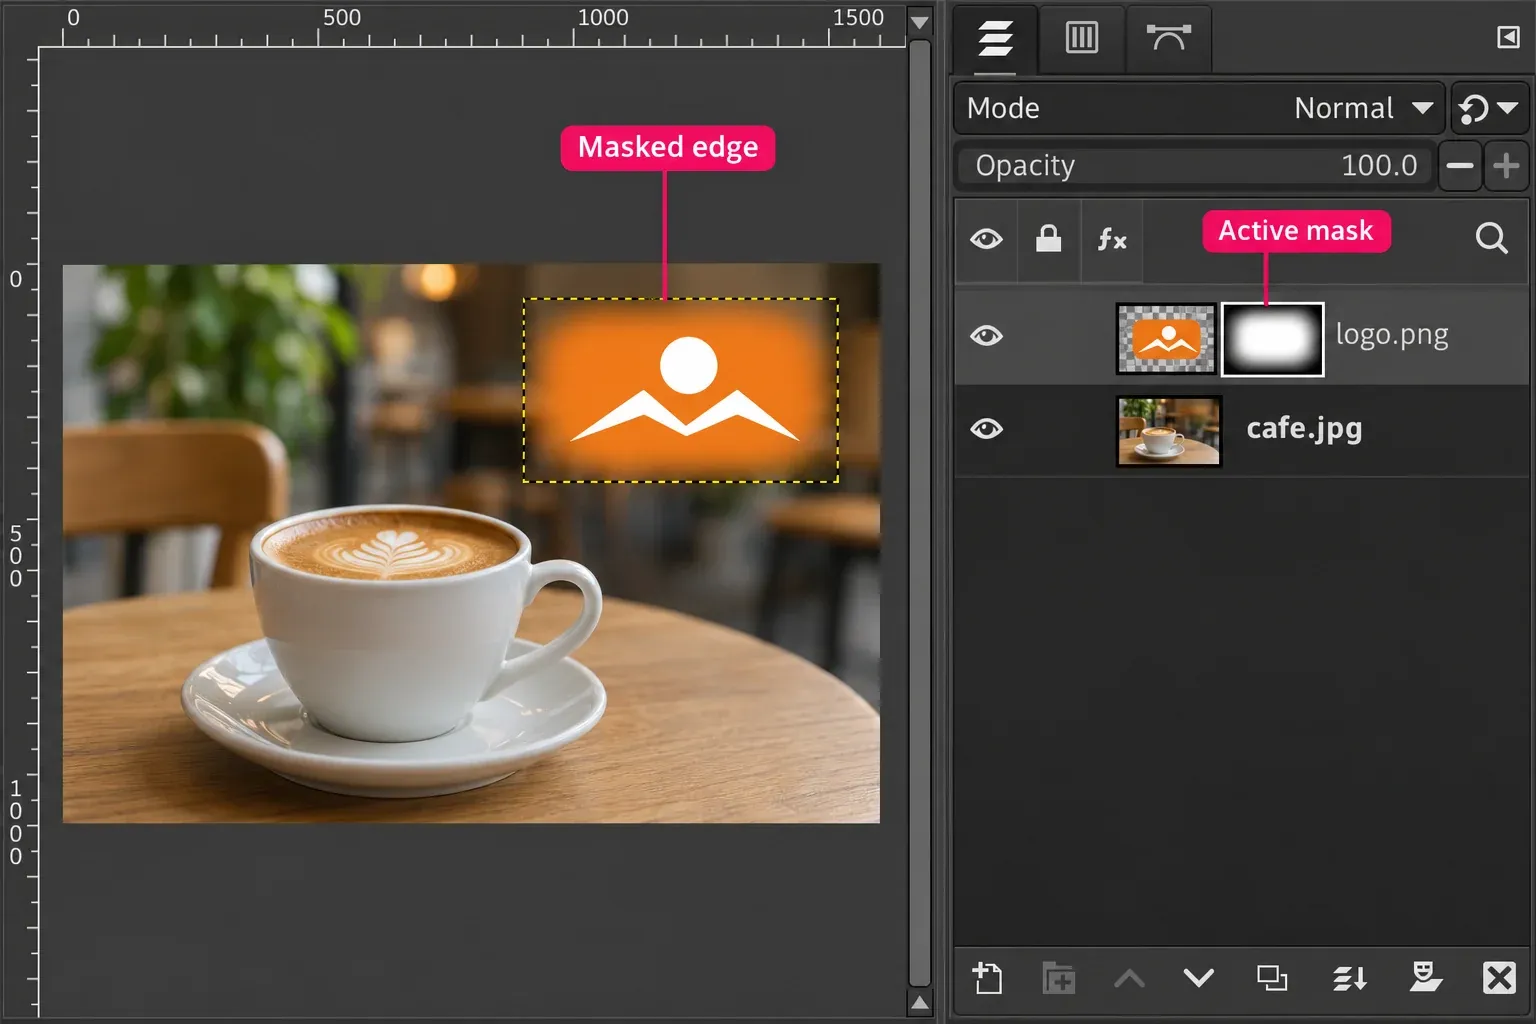
A white mask leaves the layer's existing appearance unchanged. It won't recover pixels that were already transparent or erased. Check the edge against a light background and a dark one, then return to the intended base. That exposes pale fringes which can disappear into the original white paper.
If your second image is meant to control another layer's transparency rather than appear as a photo, it belongs in a mask workflow. Keep that job separate from importing a visible layer; the layer-mask guide explains that distinction.
Use a Link Layer for a source that will change
GIMP 3.2 Link Layers update when their external image changes. Choose File > Open as Link Layer… for a logo that is still being revised elsewhere. I'd use ordinary Open as Layers when the composition should contain an independent imported copy.
A Link Layer needs Rasterize before destructive edits such as painting. Revert Rasterize returns it to the linked type and clears those destructive edits, so don't use it as a harmless visibility switch. Keep the external source available when working with the linked composition.
Save the layer stack and verify the exported picture
Before exporting, confirm that hiding the inset reveals the unchanged base, restore the intended eye icons, and check the final canvas edges. Inspect the composition at its intended viewing size as well as closer up: a clean mask matters, but so does whether the inset is legible.
Save the editable project as XCF to preserve the layers and masks. Use File > Export As… for the separate delivery file. Choose PNG when the finished picture needs transparency; an opaque photo composition can use JPEG. Don't overwrite the only original while making that delivery copy.
Reopen the exported file and check its pixel dimensions, the position of the added image, the background and the mask edge. Keep the XCF alongside it for changes to the layer stack. Exporting a finished composition doesn't require flattening the working project first.

Elena Morris
Elena Morris is the GIMP image-editing and compositing editor at TheGIMP.net. She writes about selections, masks and layers, restrained retouching, compositing and export.