Remove a background in GIMP: choose the right tool
Pick a selection tool from the background and edge, keep the pixels on a repairable mask, then check and export a transparent PNG alongside the XCF.
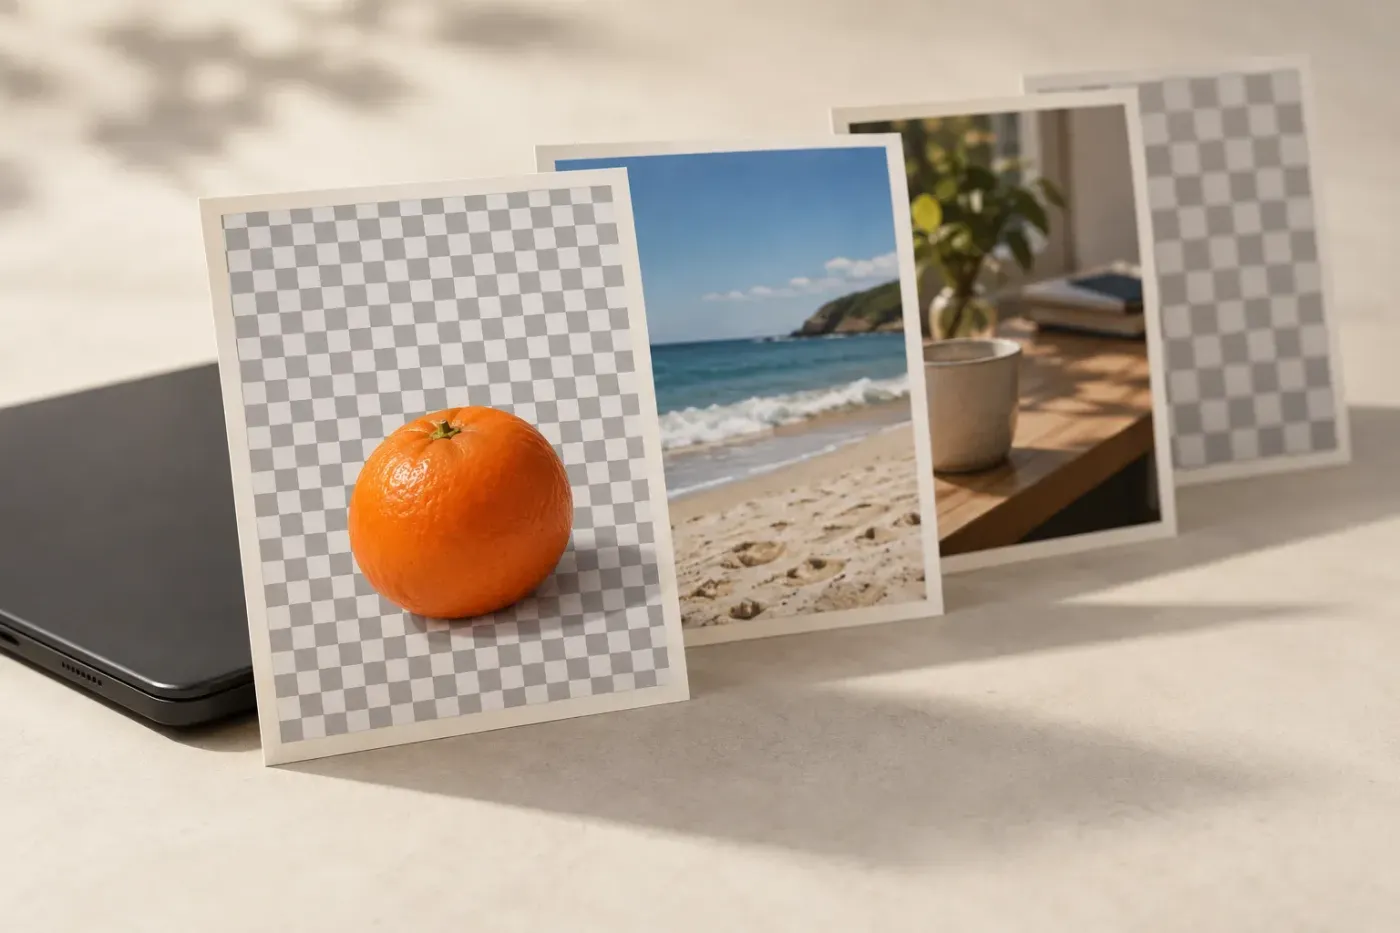
To remove a background in GIMP, select the background or subject, turn that selection into a layer mask, then export a PNG with the other background layers hidden. Start with Fuzzy Select for a connected plain backdrop, Select by Color for matching colour in separate areas, Foreground Select for hair or a busy scene, and Paths for a hard product outline. I'd keep the cutout on a mask because you can repair its edge without throwing away the original pixels.
The steps use GIMP 3.2's English labels. Choose your route below; each one finishes at the same selection-to-mask step. Pay attention to which side you selected: a subject selection and a background selection need opposite mask settings.
Choose by the backdrop and the edge
| Your picture | Start here | Watch for |
|---|---|---|
| A fairly uniform background connected around the subject | Fuzzy Select | Shadows and similar colours inside the subject. |
| Matching colour in disconnected pockets, such as gaps between parts | Select by Color | It can select that colour inside the subject too. |
| A person, pet or irregular subject in a busy scene | Foreground Select | Fine strands and gaps need their own preview checks. |
| A bottle, box or other object with a smooth hard outline | Paths | The closing segment and holes inside the object. |
For a signature or logo on white paper, use the white-background removal route: pale edge pixels and white details need different treatment from a photographic cutout. If the subject is already isolated, go straight to alpha and transparent export checks. Replacing the removed backdrop with a colour is a separate fill-layer step.
Keep the original pixels before making the selection
Open the image and select only the layer containing the subject and its background. Save an XCF working copy before you begin. XCF retains layers and editable image information, including masks, but not undo history. Keep the source photograph as well.
Don't erase the backdrop or press Delete before creating the mask. White paint on a mask reveals pixels that the mask hid; it can't restore pixels already erased from the image layer. If you've already deleted part of the subject, undo that operation while the history is available or return to the intact source.
Choose Select > None before starting a fresh selection. Once the right area is selected, keep it active until it has supplied the mask. The selection-initialised mask route below doesn't require you to add an alpha channel first.
If this layer already has a mask, Add Layer Masks is disabled. Inspect the existing mask rather than deleting it to make the menu available. A second selected layer or a visible duplicate can also confuse the result, so work on the intended layer alone.
Plain backgrounds: Fuzzy Select or Select by Color
Fuzzy Select grows through connected pixels of similar colour. Select by Color finds similar pixels wherever they occur. I'd start with Fuzzy Select around an object that contains the backdrop colour: global colour selection can include details you want to keep.
- Choose Tools > Selection Tools > Fuzzy Select, or Tools > Selection Tools > By Color Select for disconnected areas. By Color Select is the menu label for Select by Color.
- In Tool Options, start in Replace mode. Leave Sample Merged off to sample this layer alone; enabling it includes all visible layers in the colour calculation.
- Keep Antialiasing enabled for a smoother selection boundary. Don't enable Feather edges automatically. Feathering blurs the boundary into partial selection; too broad a transition is unhelpful around a crisp product edge.
- Press on a representative background pixel and hold the mouse button. Drag down or right to increase the threshold, or up or left to reduce it. Both tools support this. Release when the backdrop is selected without spreading into the subject.
- For a missed background pocket, choose Add in the selection tool's Mode and click that pocket. If a subject detail was included, choose Subtract and select the unwanted portion of the selection. These modes combine with the selection you already have; Replace would discard it.
- Check the outside and the gaps inside handles, arms or leaves. Keep the background selection active and follow the background selected row at the mask step.
Threshold controls the accepted colour range. It isn't an edge-quality slider, and a single number can't suit a flat logo, a shaded wall and a compressed photograph. If adding the wall also selects the subject, stop widening the range and use another route. Fuzzy Select can jump small gaps at some thresholds, so inspect narrow breaks in the outline.
Turn on Draw Mask to see the selected area while holding the mouse button. For a fuller inspection after releasing it, Select > Toggle Quick Mask shows the selection as an overlay: fully selected pixels are clear and unselected areas are covered. Toggle it off again before creating the layer mask. The marching ants show the half-selected boundary; they don't display every partially selected edge pixel.
Busy backgrounds, hair and fur: Foreground Select
Foreground Select uses the colours you mark to separate the subject within a rough outline. Save the XCF first: the manual warns that processing large images can use substantial memory and cause slowdowns or crashes. Raising every processing setting isn't a substitute for better foreground and background marks.
- Choose Tools > Selection Tools > Foreground Select and set selection Mode to Replace. Roughly enclose the whole subject with a little background around it. Click the starting dot or double-click to close the outline. Press Enter, or double-click inside, to create the working mask.
- Use Draw foreground to brush through representative subject colours. Adjust Stroke width so the stroke stays inside the subject. Don't draw across a background gap while connecting two parts of the subject.
- Enable Preview mask. Switch to Draw background and mark unwanted backdrop caught inside the extraction. Use Grayscale preview when a black-and-white view makes the separation easier to judge.
- If part of the subject lies outside the initial outline, use Draw unknown on the missed foreground in the unknown area. Toggle the preview and inspect it again. Check the fine hair or fur separately from the solid centre.
- Click Select when the extraction is usable. This finishes Foreground Select and produces a subject selection. Keep it active for the subject selected row at the mask step.
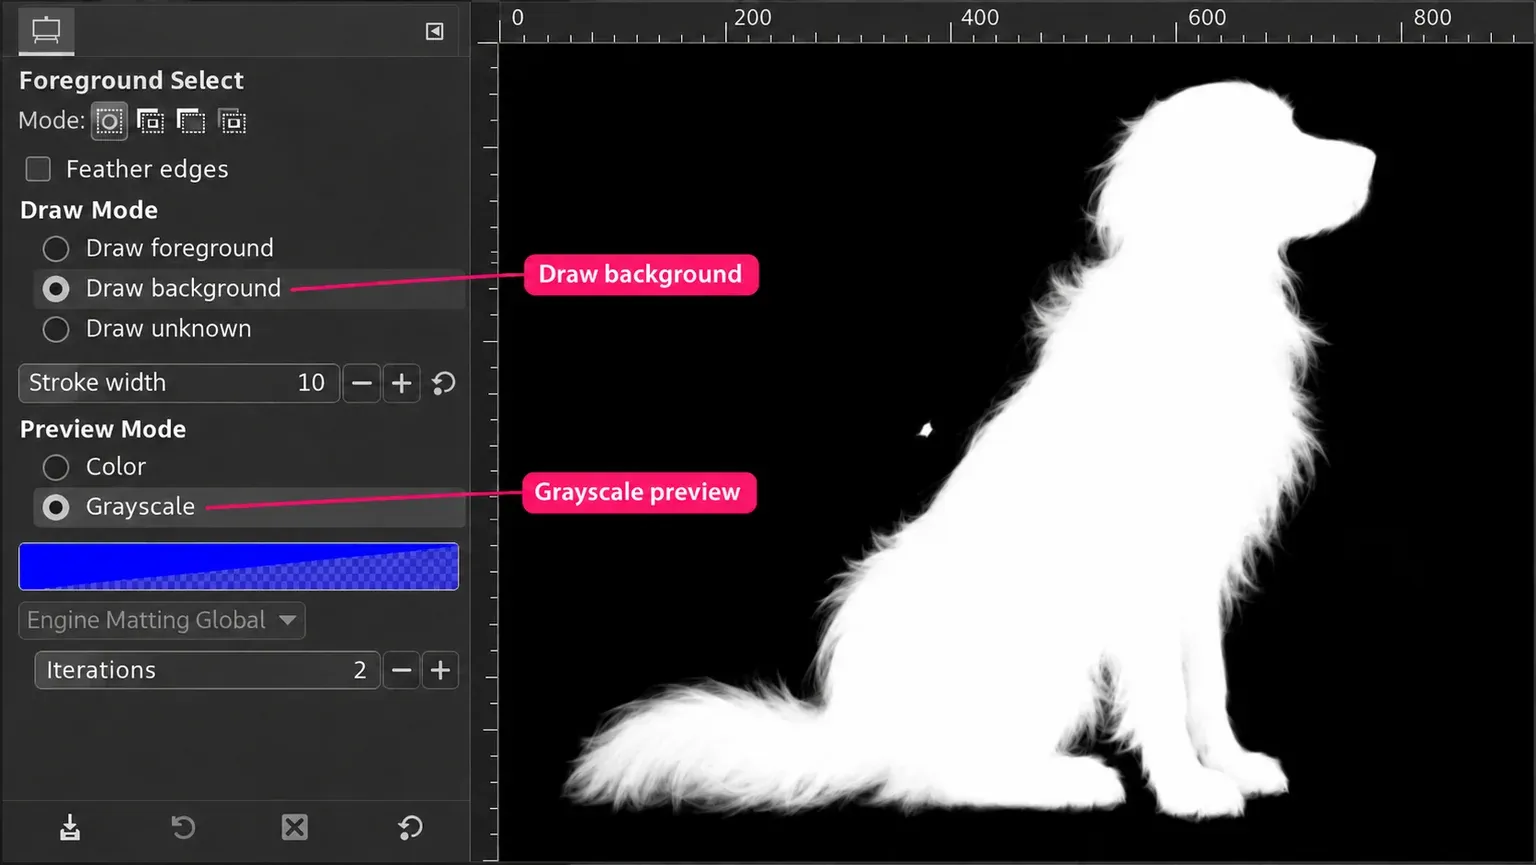
The working mask in Foreground Select belongs to the extraction process. The layer mask you add next stays with the image layer for later repairs. Don't trace every hair with a hard path or paint every strand as solid white: the fine boundary needs partial transparency. Where subject and backdrop are difficult to distinguish, refine the marks and judge the resulting edge rather than accepting the whole outline after one preview.
Hard product edges: trace a path
I'd use Paths around a bottle or laptop whose reflections overlap the backdrop colour. Editable curves follow the object's geometry without selecting every similar-coloured pixel.
- Choose Tools > Paths and use Design mode. Click successive control points around the subject. Drag a new node or segment to form a curve, then adjust its handles to follow the outline.
- In GIMP 3.2, click the initial point to close the path. Inspect that final segment too. An open path becomes closed by a straight line when converted to a selection, which can cut across the subject.
- Click Selection from Path in Tool Options. Inspect the subject selection. If a handle hole or other internal gap is included, use a suitable selection tool in Subtract mode to remove that gap from the subject selection.
- Keep the finished selection active and follow the subject selected row below.
The path remains editable, but the selection made from it is independent. If you adjust the contour, click Selection from Path again before making the mask. Editing the path later doesn't reshape an existing mask. This route defines an outline; it won't recover the original scene through transparent glass.
Turn the selection into a repairable mask
Keep the selection active and the intended image layer selected. Choose Layer > Mask > Add Layer Masks…. Under Initialize Layer Mask to, choose Selection. Selected areas become opaque and unselected areas transparent, so set inversion by the side you selected:
| Your active selection | Invert mask | Expected result |
|---|---|---|
| The subject, usually from Foreground Select or Paths | Unchecked | Subject visible; outside hidden. |
| The background, usually from Fuzzy Select or Select by Color | Checked | Outside hidden; subject visible. |

Invert once. These instructions leave each selection as the tool produced it and use the mask setting in the table. If you've already inverted the selection, follow the row for the selection you have now.
- Click Add. The mask thumbnail appears to the right of the layer thumbnail. If another complete image layer is visible below it, that layer will still fill the hidden area. Hide the spare background to inspect the cutout.
- Choose Select > None. The selection has supplied the mask; clearing it now lets you repair either side of the edge.
- Click the mask thumbnail in the Layers dock and check its white border. GIMP 3.2 remembers an Edit Mask Immediately option; explicitly choosing the thumbnail avoids relying on its previous state.
- Choose Paintbrush. Paint black to hide background leftovers, white to reveal existing subject pixels and grey for partial transparency. Match the brush edge to the local boundary: a hard product contour and a soft tuft of fur need different treatment.
If the brush changes the photograph's colour, you're painting the image thumbnail. Stop and select the mask. If the subject disappeared when the mask was added, check the selection side and inversion before repainting the whole mask. For a deeper explanation of mask controls, use the layer-mask guide.
Check the edge against dark and light fills
The checkerboard identifies transparency, but pale fringe can hide against its light squares. I'd inspect the same edge on two contrasting fills before calling the cutout finished.
- Choose Layer > New Layer…, set Fill With to White and create the layer. It's inserted above the selected layer; drag it below the cutout in the Layers dock.
- Set a dark foreground colour in the Toolbox. Create another layer with Fill With > Foreground color and drag that below the cutout too.
- Show one fill at a time using the visibility icons. Inspect the full outline, internal gaps and fine details at a close zoom and at the size the image will be used. Click the cutout's mask thumbnail again before painting: making the check layers changed the active layer.
- Hide both check layers when finished. With spare backgrounds hidden too, the transparent area should show the checkerboard.
A solid remnant outside a hard edge needs a local mask correction. A pale rim on dark or dark fringe on white needs a closer look at the partially visible boundary. Avoid blurring the entire mask to conceal one patch; that also softens the good sections.
A mask changes visibility, so a visible edge pixel can still contain colour from its old backdrop. Hiding more of that edge may remove fine detail as well. For artwork on a uniform white ground, Color to Alpha can remove that colour while preserving partial edge transparency, but it can also make matching subject colours transparent. Follow the protected white-background workflow for that case. Don't apply it across a photograph simply because one edge has a halo.
Save the XCF and export a transparent PNG
Save the layered XCF again. Hide the temporary fills and every spare background layer, then choose File > Export As… and give the output a .png filename. PNG supports transparency; JPEG doesn't. Don't flatten the working image to prepare this transparent output.
In the PNG options, keep Pixel format on Automatic, or choose an RGB format with alpha if you need to set it explicitly. A format without alpha discards transparency. For a photographic cutout, avoid reducing it to an indexed palette just to make the file smaller. PNG compression is lossless: the compression level affects file size and processing time, not edge sharpness. Finish the export, then reopen the exported PNG in GIMP. Check that the outside and internal gaps show transparency, and inspect the boundary over a temporary fill again. Keep the XCF for changing the mask later; the exported PNG doesn't preserve that editable layer structure.
| What went wrong? | Check | Next action |
|---|---|---|
| Background still visible after adding a mask | A complete image or fill layer underneath; wrong selection side | Hide the lower backgrounds, then recheck mask inversion. |
| White brush won't restore a missing part | Active thumbnail, leftover selection and whether pixels were erased earlier | Select the mask and clear the selection. Return to an intact source if the image pixels were deleted. |
| Cutout looks soft or has a rim | Feathering, partial mask values and old backdrop colour at the edge | Inspect locally on light and dark. Repair the affected area without blurring the whole contour. |
| Export has a solid backdrop | Visible lower layers and the output extension | Hide the fills and spare originals, export PNG, then reopen that exact file. |
Can GIMP remove the background automatically?
The built-in stable GIMP 3.2 tools described here start with your selection or foreground marks. Don't plan this workflow around Paint Select: the 3.2 release notes place it in the development Playground and require development builds.
For automatic removal, the RemoveBG-GIMP maintainer supplies a GIMP 3.0-or-higher script, and the remove.bg integration page requires an account and API key or sign-in. This is a third-party integration. The maintainer says it uploads the image to remove.bg, so keep confidential images out of that route.
Check the current package before installing: the README's Linux paragraph still names GIMP 2 Python packages and doesn't establish a complete GIMP 3 setup; it doesn't document macOS installation. Use the running application's paths and a compatible package as explained in installing GIMP plug-ins. An automatic cutout still needs the same light-and-dark edge check and a saved export check before you place it on its final background.

Elena Morris
Elena Morris is the GIMP image-editing and compositing editor at TheGIMP.net. She writes about selections, masks and layers, restrained retouching, compositing and export.