Replace one colour with another in GIMP
Use Color Exchange for a source-to-target swap, a solid fill for flat artwork or a hue adjustment for shaded objects. Isolate the object and keep the edge editable.
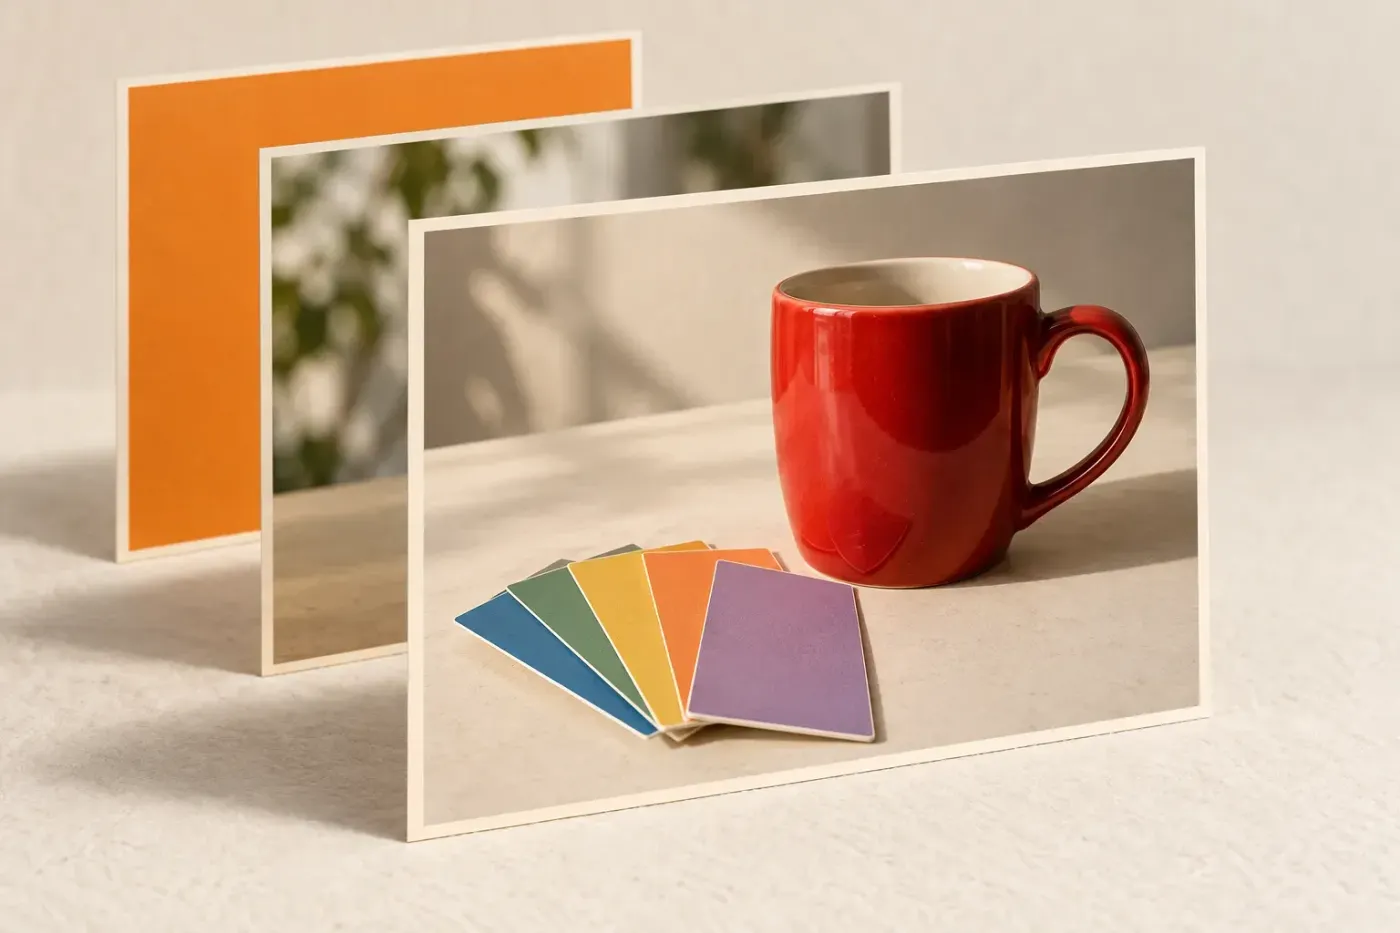
To replace one colour with another in GIMP, select the intended image layer and open Colors > Map > Color Exchange…. Pick the original with From color, choose the replacement with To color, and adjust the three colour thresholds while watching the preview. Keep the object selected if the same source colour elsewhere in the picture should stay unchanged.
I'd use a selected solid fill for a flat logo that needs a particular colour, and Hue-Saturation for a photographed object whose shading matters. A red shirt contains shadows, highlights and reflections; turning every selected pixel into the same blue removes the information that makes it look like fabric. The choice starts with that distinction.
Choose the method from the pixels you need to keep
| The job | Start here | Watch for |
|---|---|---|
| A source colour and nearby shades need a replacement | Color Exchange | RGB thresholds can reach unwanted colours too. |
| A flat logo, icon or raster lettering needs a solid colour | Select by Color, then fill | Partially selected edge pixels can keep a mixture. |
| A coloured shirt, roof or product must retain its texture | Hue-Saturation on an isolated object | A colour range doesn't distinguish one object from another. |
| Black, white or grey fabric needs a tint | Colorize | Lightness may need adjustment; clipped detail can't be recovered. |
| One band of hues should become another band | Rotate Colors | Source-range direction and Gray Handling change the result. |
| A greyscale drawing needs a dark-to-colour tonal mapping | Gradient Map | The current gradient determines both endpoints. |
Colour matching answers “which pixels resemble this sample?” A spatial selection answers “which part of the picture may change?” Combine them when necessary: a red roof and a red mailbox can share a colour without belonging to the same edit. For a replacement backdrop behind a cut-out, use the separate-layer route to change the background colour instead.
Keep an original and target the right layer
Save a separate XCF working copy before recolouring. In the Layers dock, select only the picture layer you intend to edit and choose Layer > Duplicate Layers. The command copies each selected layer; keep the editable copy above the unchanged original, and select the copy's image thumbnail rather than its mask.
If the file is Grayscale or Indexed, use Image > Mode > RGB for the colour-editing routes here. An indexed image, such as a palette-based GIF, has a limited set of colours; converting to RGB mode makes it an RGB image. It doesn't restore colour information previously discarded from a greyscale picture. Keep the original before a mode change.
A white surround is opaque image content; a transparent surround lets lower layers show through. Recolouring the object and supplying a backdrop are separate operations. When selecting or filling, check the exact layer and any parent group rather than assuming the visible colour belongs to the top layer.
Replace a source colour with Color Exchange
GIMP's Color Exchange filter replaces a colour using a From color and a To color. Use it when the starting colour is identifiable and you want control over how far the replacement extends into nearby RGB values.
- Work on the copy prepared above. Select the object first if another object with the same colour must remain unchanged. Leave no selection only when the whole layer is the intended target.
- Open Colors > Map > Color Exchange… and enable Preview.
- Use the From color picker to sample the actual source colour in the picture, or click its colour button to specify it. For a compressed JPEG, a visually uniform area may contain several slightly different colours.
- Set To color with its colour button or picker.
- Start with narrow Red Threshold, Green Threshold and Blue Threshold settings. Raise the relevant tolerance only while it adds wanted pixels. These are sensitivity controls for the three components, rather than a count of colours.
- Inspect the centre, edge, dark areas and nearby objects. If only scattered pixels change, resample the source and widen the tolerance cautiously. If unwanted areas change, reduce it or restrict the spatial selection.
- In GIMP 3.2, leave Merge filter unchecked to retain the eligible filter as a layer effect, then accept with OK. Check the result with the preview off as well as on before accepting.
The higher each threshold, the more pixels can be affected. No single threshold suits every image. A low tolerance may leave JPEG noise and mixed edge colours behind; a high tolerance can collect the wall, skin or label beside the target.
I'd switch to a whole-object hue adjustment when the desired colour spans many shadows and highlights. Increasing three tolerances until everything changes can make the boundary harder to control. If the requirement is one uniform value across a flat mark, the selected-fill method below is more direct.
Give a flat graphic one solid replacement colour
For disconnected pieces of a logo, Select by Color collects similar pixels across the layer. Fuzzy Select follows a connected region instead. The By Color Select command uses Shift+O in the default shortcut scheme; its menu path is Tools > Selection Tools > By Color Select.
- Activate the copy's image thumbnail. In the selection tool's options, leave Sample merged off to sample that layer alone.
- Click the source colour. Adjust Threshold and select again until the wanted pieces are included without collecting other objects. For more immediate feedback, click and drag to change the threshold.
- Inspect every matching area, including holes and isolated dots. Draw mask shows the selected area while the mouse button is held; it is a selection preview, not a permanent layer mask.
- Set the foreground swatch to the desired solid colour. With the selection still active, choose Edit > Fill with FG Color.
- Choose Select > None and check the result at 100% zoom, then at its intended display size.
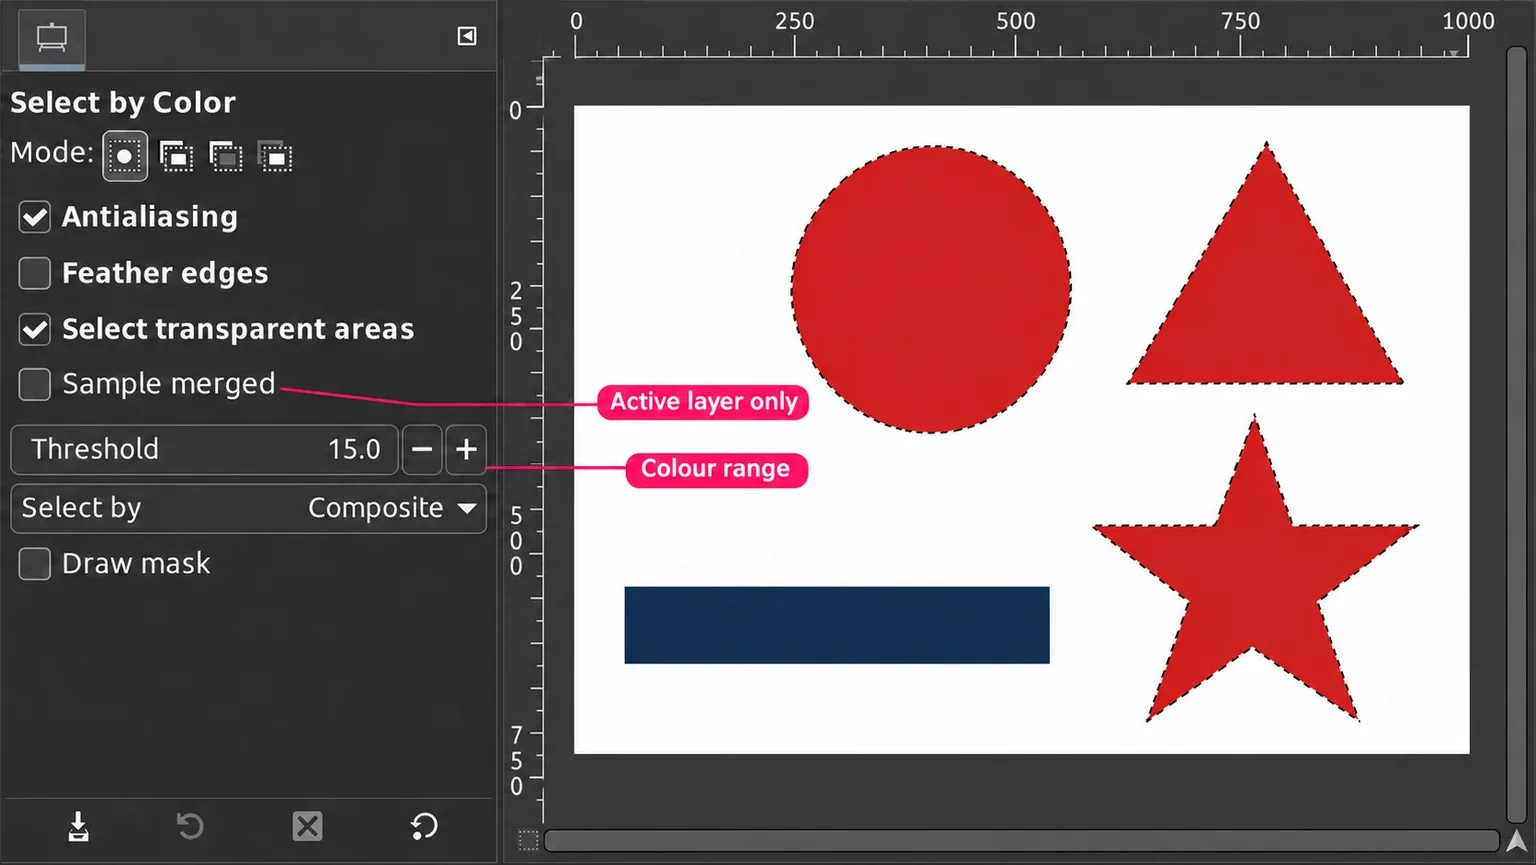
Threshold and Sample merged control what the colour-selection tools sample. Raising Threshold doesn't mean “select this many colours”. On a shaded surface, it can still miss highlights while including an unrelated object; select the object's outline when colour similarity stops being useful.
The foreground-fill command fills the whole active layer when no selection exists. Check the selection before filling. Fully selected pixels get the solid fill; partially selected pixels are filled proportionally. An antialiased edge can therefore retain a mix of old and new colour. Broad feathering adds a soft transition, which is often the wrong treatment for crisp lettering.
For a fringe, undo the fill and inspect the selected boundary against a contrasting background. Include the appropriate edge pixels or repair them locally. Repeatedly filling the same inaccurate selection can strengthen its edge without fixing which pixels it includes.
Change editable text through the Text tool
For a text layer, activate the Text tool and click the text on the canvas. Select the characters to recolour, then use Change color of selected text on the floating text toolbar. Select the whole line if it should all change. Keep pixel filling for lettering that is already rasterised.
Change a photographed object while keeping its shading
Select the whole object, rather than only one shade within it. Include its dark folds and bright reflections, and exclude a print or label whose colours should stay. The tool-choice steps for isolating a subject and making a mask also work when the subject stays in the original photograph.
For an edge you may need to repair, I'd use a masked copy over the original. That keeps the colour adjustment and its visible boundary separately adjustable:
- Start with a duplicate of the unmasked photo above the original. Make the object selection on the copy.
- Choose Layer > Mask > Add Layer Masks…. Initialise it from Selection, leave Invert mask unchecked, and click Add. Selection initialisation keeps selected areas opaque and unselected areas transparent.
- Choose Select > None, then click the copy's image thumbnail. The mask limits where the adjusted copy shows, while the original below supplies the rest of the scene.
- Open Colors > Hue-Saturation…. Leave Merge filter unchecked and enable Preview.
- Choose Master to shift every colour of the isolated object together. Move Hue, initially leaving Saturation and Lightness unchanged. Adjust them only as the result requires.
- Compare a shadow, midtone and highlight. Check the outline for colour spill, then accept with OK.
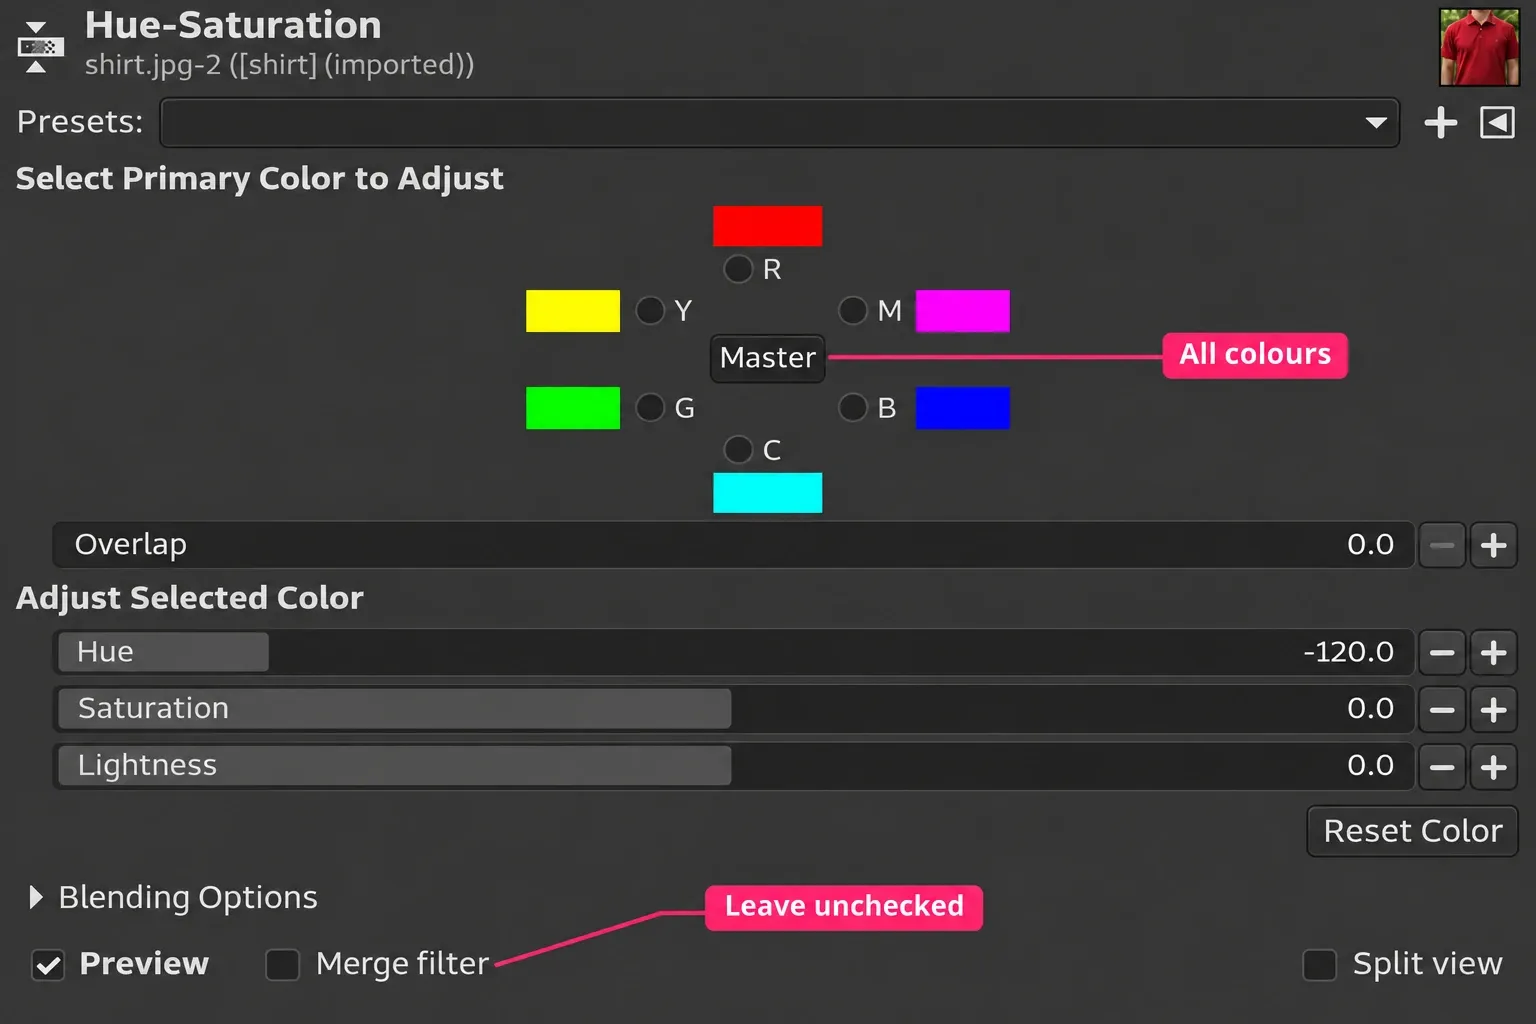
Hue-Saturation works on the selection or active layer. Its six named colour ranges are ranges of colour, rather than objects. Choosing Reds can affect both a red roof and a red mailbox unless the spatial selection or masked-copy arrangement separates them.
A shaded blue shirt needs different RGB values across its folds. Judge whether the hue and tonal structure look right together; a single target swatch isn't a promise that every pixel should become that exact value.
Repair the boundary without repeating the colour adjustment
Click the copy's mask thumbnail and paint white to reveal more of the recoloured copy, or black to reveal the unchanged original underneath. The active mask thumbnail has a white border. Clear any leftover selection before brushing, and return to the image thumbnail before adjusting colour again.
For transparency at the outer edge, inspect over temporary light and dark backgrounds. Pale remnants are easier to see against dark; dark remnants stand out against light. Keep repairs local so a correction to one edge doesn't soften detail elsewhere.
Tint black, white or grey with Colorize
Neutral pixels have no useful hue to rotate. Colors > Colorize… gives the selected area a tint: GIMP describes it as greyscale viewed through coloured glass. Use the whole-object selection or masked copy above, and ensure the image is in RGB mode.
- Target the image thumbnail, then open Colors > Colorize…. Keep Merge filter unchecked for an editable effect.
- Click Color and choose the tint. Choosing a colour updates the Hue, Saturation and Lightness controls, so inspect them afterwards.
- Start from Lightness 0.0 for normal brightness. Darken a white area or lighten a black area as needed for the tint to become visible, while checking that useful folds remain.
- Compare shadows, midtones and highlights with Preview, and accept when the tone and boundary work together.
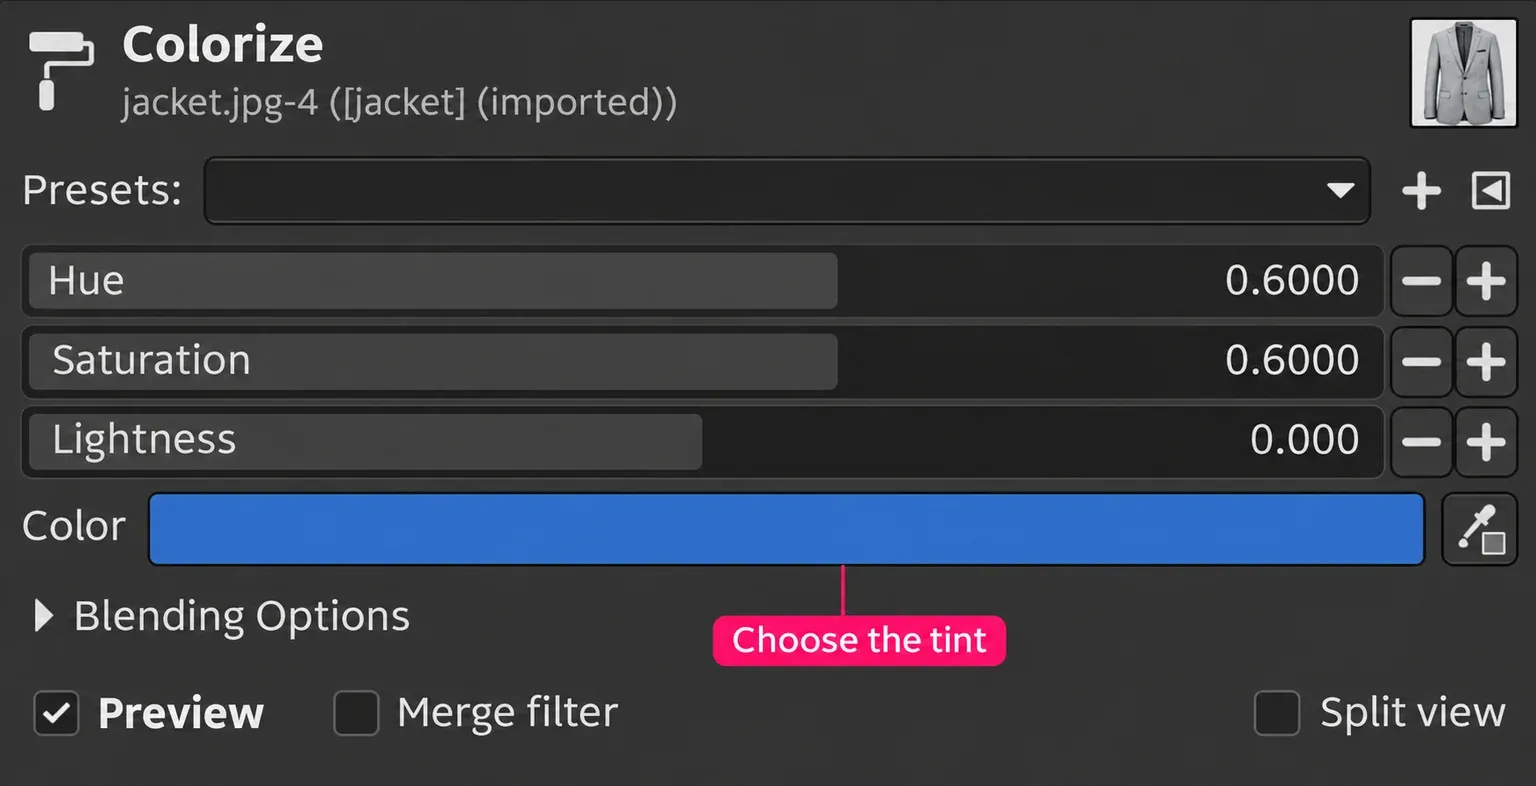
In this dialog, Hue runs from 0.0 to 1.0 and Lightness from -1.0 to +1.0. Those values use a different scale from the Hue-Saturation dialog. The shown blue tint is an example, not a setting to copy for every photograph.
Colorize applies one tint across the target. Protect a multicoloured print with the selection or mask if its colours must remain. A featureless clipped white or black patch contains no texture for a tint to recover.
Map one band of hues into another with Rotate Colors
Colors > Map > Rotate Colors… exchanges a Source Range for a Destination Range. Use it when several related hues should move together, rather than forcing a separate Color Exchange for every shade.
Keep the object isolated. In each colour wheel, move the two handles to set the start and end of the range, then check its direction. The Clockwise and Invert Range controls change which arc is used. Watch Preview while adjusting both ranges; the unwanted wall can sit inside the same hue band as the object.
Grey is excluded from rotation by default. Gray Handling can treat low-saturation colours as a chosen colour or change them directly, but check washed-out highlights before widening that treatment. For an entirely neutral object, Colorize is the clearer starting point.
Map a greyscale drawing from black to a chosen colour
For white lines on black that should become green lines on black, a gradient map gives explicit tonal endpoints. It maps dark pixels towards the left end of the current gradient and light pixels towards the right, with intermediate tones between them.
- Work on a duplicate in RGB mode. Set the foreground colour to black and the background colour to the desired green.
- Open Windows > Dockable Dialogs > Gradients and choose FG to BG (RGB). Check that the gradient preview runs from black on the left to green on the right.
- Select the part of the drawing to change, or clear the selection if the whole layer is intended.
- Choose Colors > Map > Gradient Map, then inspect the dark background and pale lines.
The FG to BG (RGB) gradient uses the Toolbox's two colours. Gradient Map uses the current gradient and runs without a settings dialog, so choose the gradient before invoking it. For dark lettering on white paper, decide whether the light endpoint should remain white instead; a black-to-green mapping intentionally changes white to green. Keep the working copy so you can return to the original mapping.
If the colour doesn't change, check the symptom
| Symptom | Check and action |
|---|---|
| A colour command is unavailable | Image mode and editing target. Use RGB for these routes; select the picture thumbnail. |
| Color Exchange changes almost nothing | From color, thresholds and remaining selection. Sample the actual source; expand tolerance cautiously and inspect the selected area. |
| The same colour changes elsewhere | Whole-layer targeting or Select by Color collecting disconnected regions. Restrict the object spatially with a selection or mask. |
| The mask changes, not the picture | The selected thumbnail. Undo, then target the layer's image thumbnail. |
| The result is hidden or unexpectedly faint | Layers above, eye icons, layer/effect opacity and blending modes. Compare the edited copy with the original; inspect its parent group too. |
| Only part of the object changes | Missed folds, a leftover selection, narrow colour tolerance or a mask hiding the copy. Repair the selection or mask before broadening the colour adjustment. |
The Layers dock identifies image and mask targets, visibility, opacity and locks. If a pixel fill is blocked, check the layer's pixel lock as well. If a filter appears unchanged, confirm Preview is enabled before replacing the effect with another copy of the same adjustment.
Replacing a colour with transparency is a separate operation. For a white surround, remove the white while protecting wanted white details. Ordinary colour replacement doesn't make the remaining background transparent or turn a raster drawing into vector cut paths.
Save the editable colour change and inspect the delivery file
In GIMP 3.2, Merge filter determines whether eligible GEGL adjustments remain layer effects. The setting is remembered, so check it before accepting. To revisit an effect, click the layer's fx icon, select the effect in the Layer Effects dialog and choose Edit Layer Effects. Change the settings and accept with OK.
Save the project as XCF. XCF retains layer effects, while export merges their visible result into the delivery file. Keep the mask, unchanged original and adjusted copy available. A saved XCF doesn't retain undo history; keeping those layers is the practical way back.
Export a PNG when the graphic needs transparency or lossless flat-colour edges. JPEG suits an opaque photograph, but its compression can change fine boundaries and colour values. Open the exported file and check the intended colour, nearby protected objects, holes and edges. Hide temporary checking backgrounds before a transparent PNG export, and keep the XCF for the next colour variant.

Elena Morris
Elena Morris is the GIMP image-editing and compositing editor at TheGIMP.net. She writes about selections, masks and layers, restrained retouching, compositing and export.